Halloween Crafts & Sensory Play for Kids!
Halloween is such a fun time of year for crafts, process art and sensory play. Here are five new projects and some fun sensory play ideas to try at home with kids of all ages. Be sure to check out some of our old Halloween favorites here, some Memphis themed Halloween projects and our Ultimate Slime Guide as slime is always a hit at Halloween.
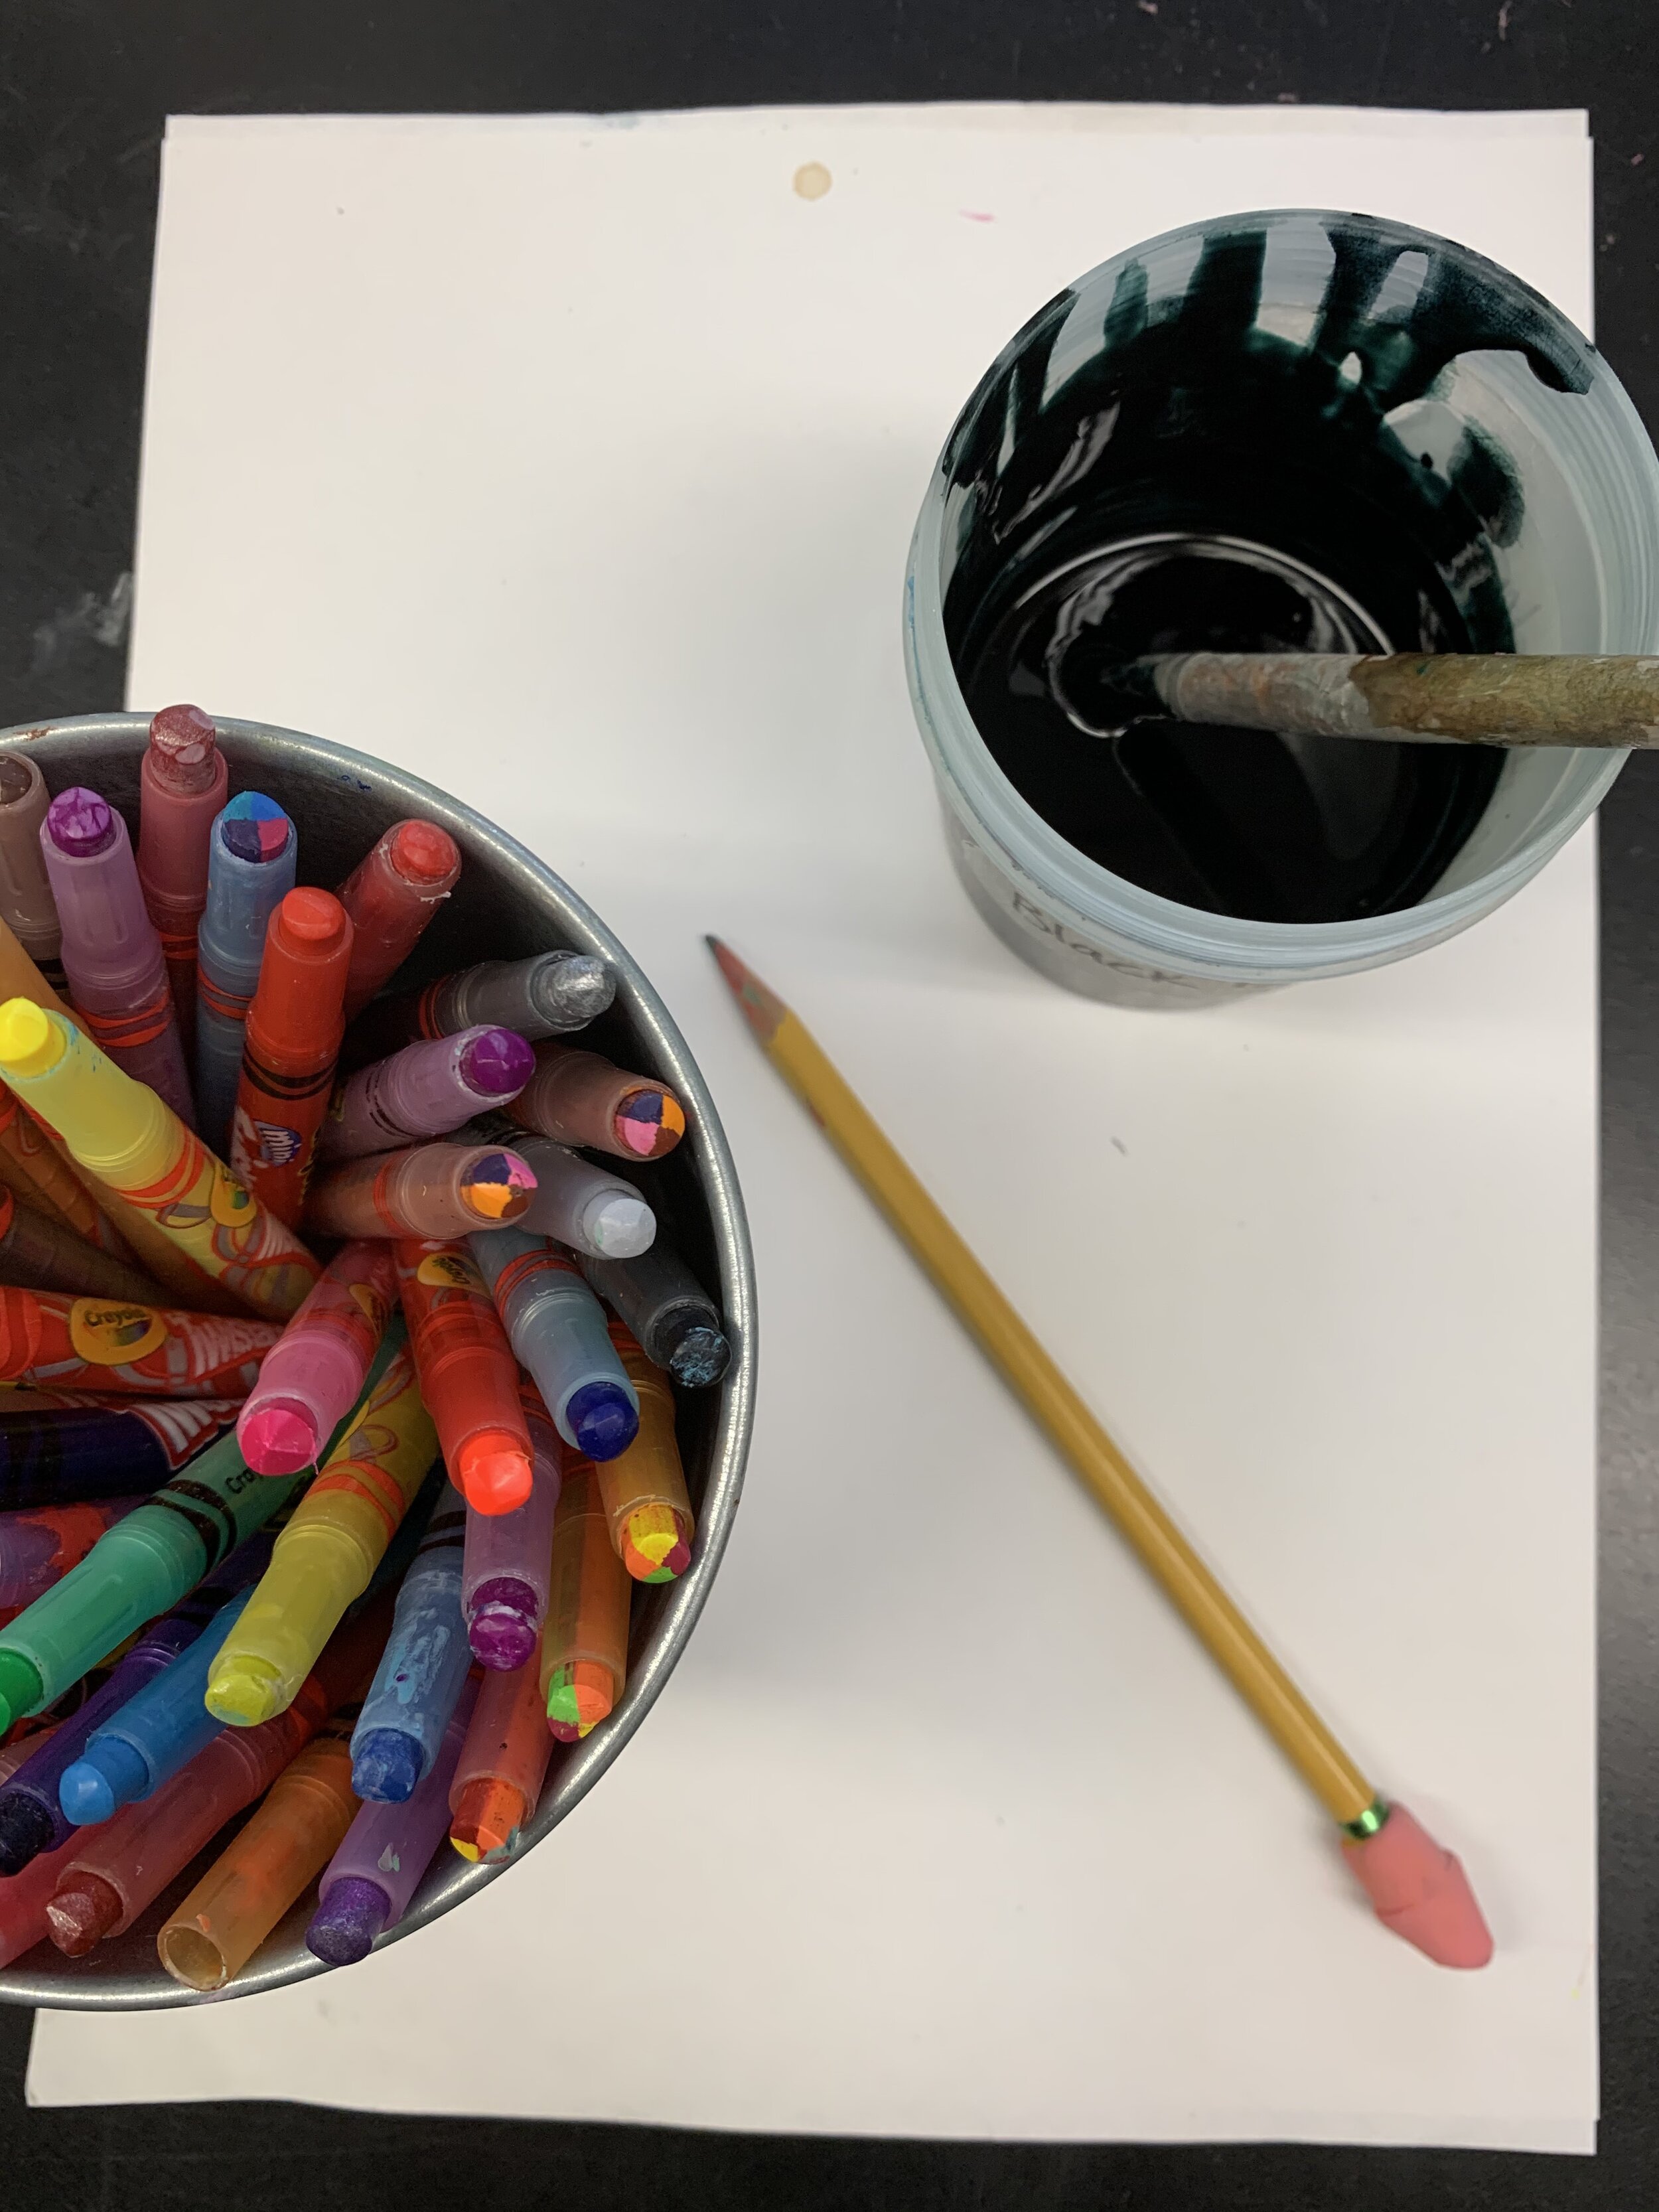
Paint & Color a Haunted House
What You’ll Need:
Thin paintbrush
Pencil/eraser
Paper
Instructions:
Use black liquid watercolor to outline your haunted house. Don’t forget about the background details! Use quick & thick lines - it doesn’t have to be perfect! *Optional: you can pre-sketch with a pencil/eraser if you’d like and outline it with the black paint.
Color in your lines using twistable crayons. Pick fun, bright and unexpected colors. Get creative!
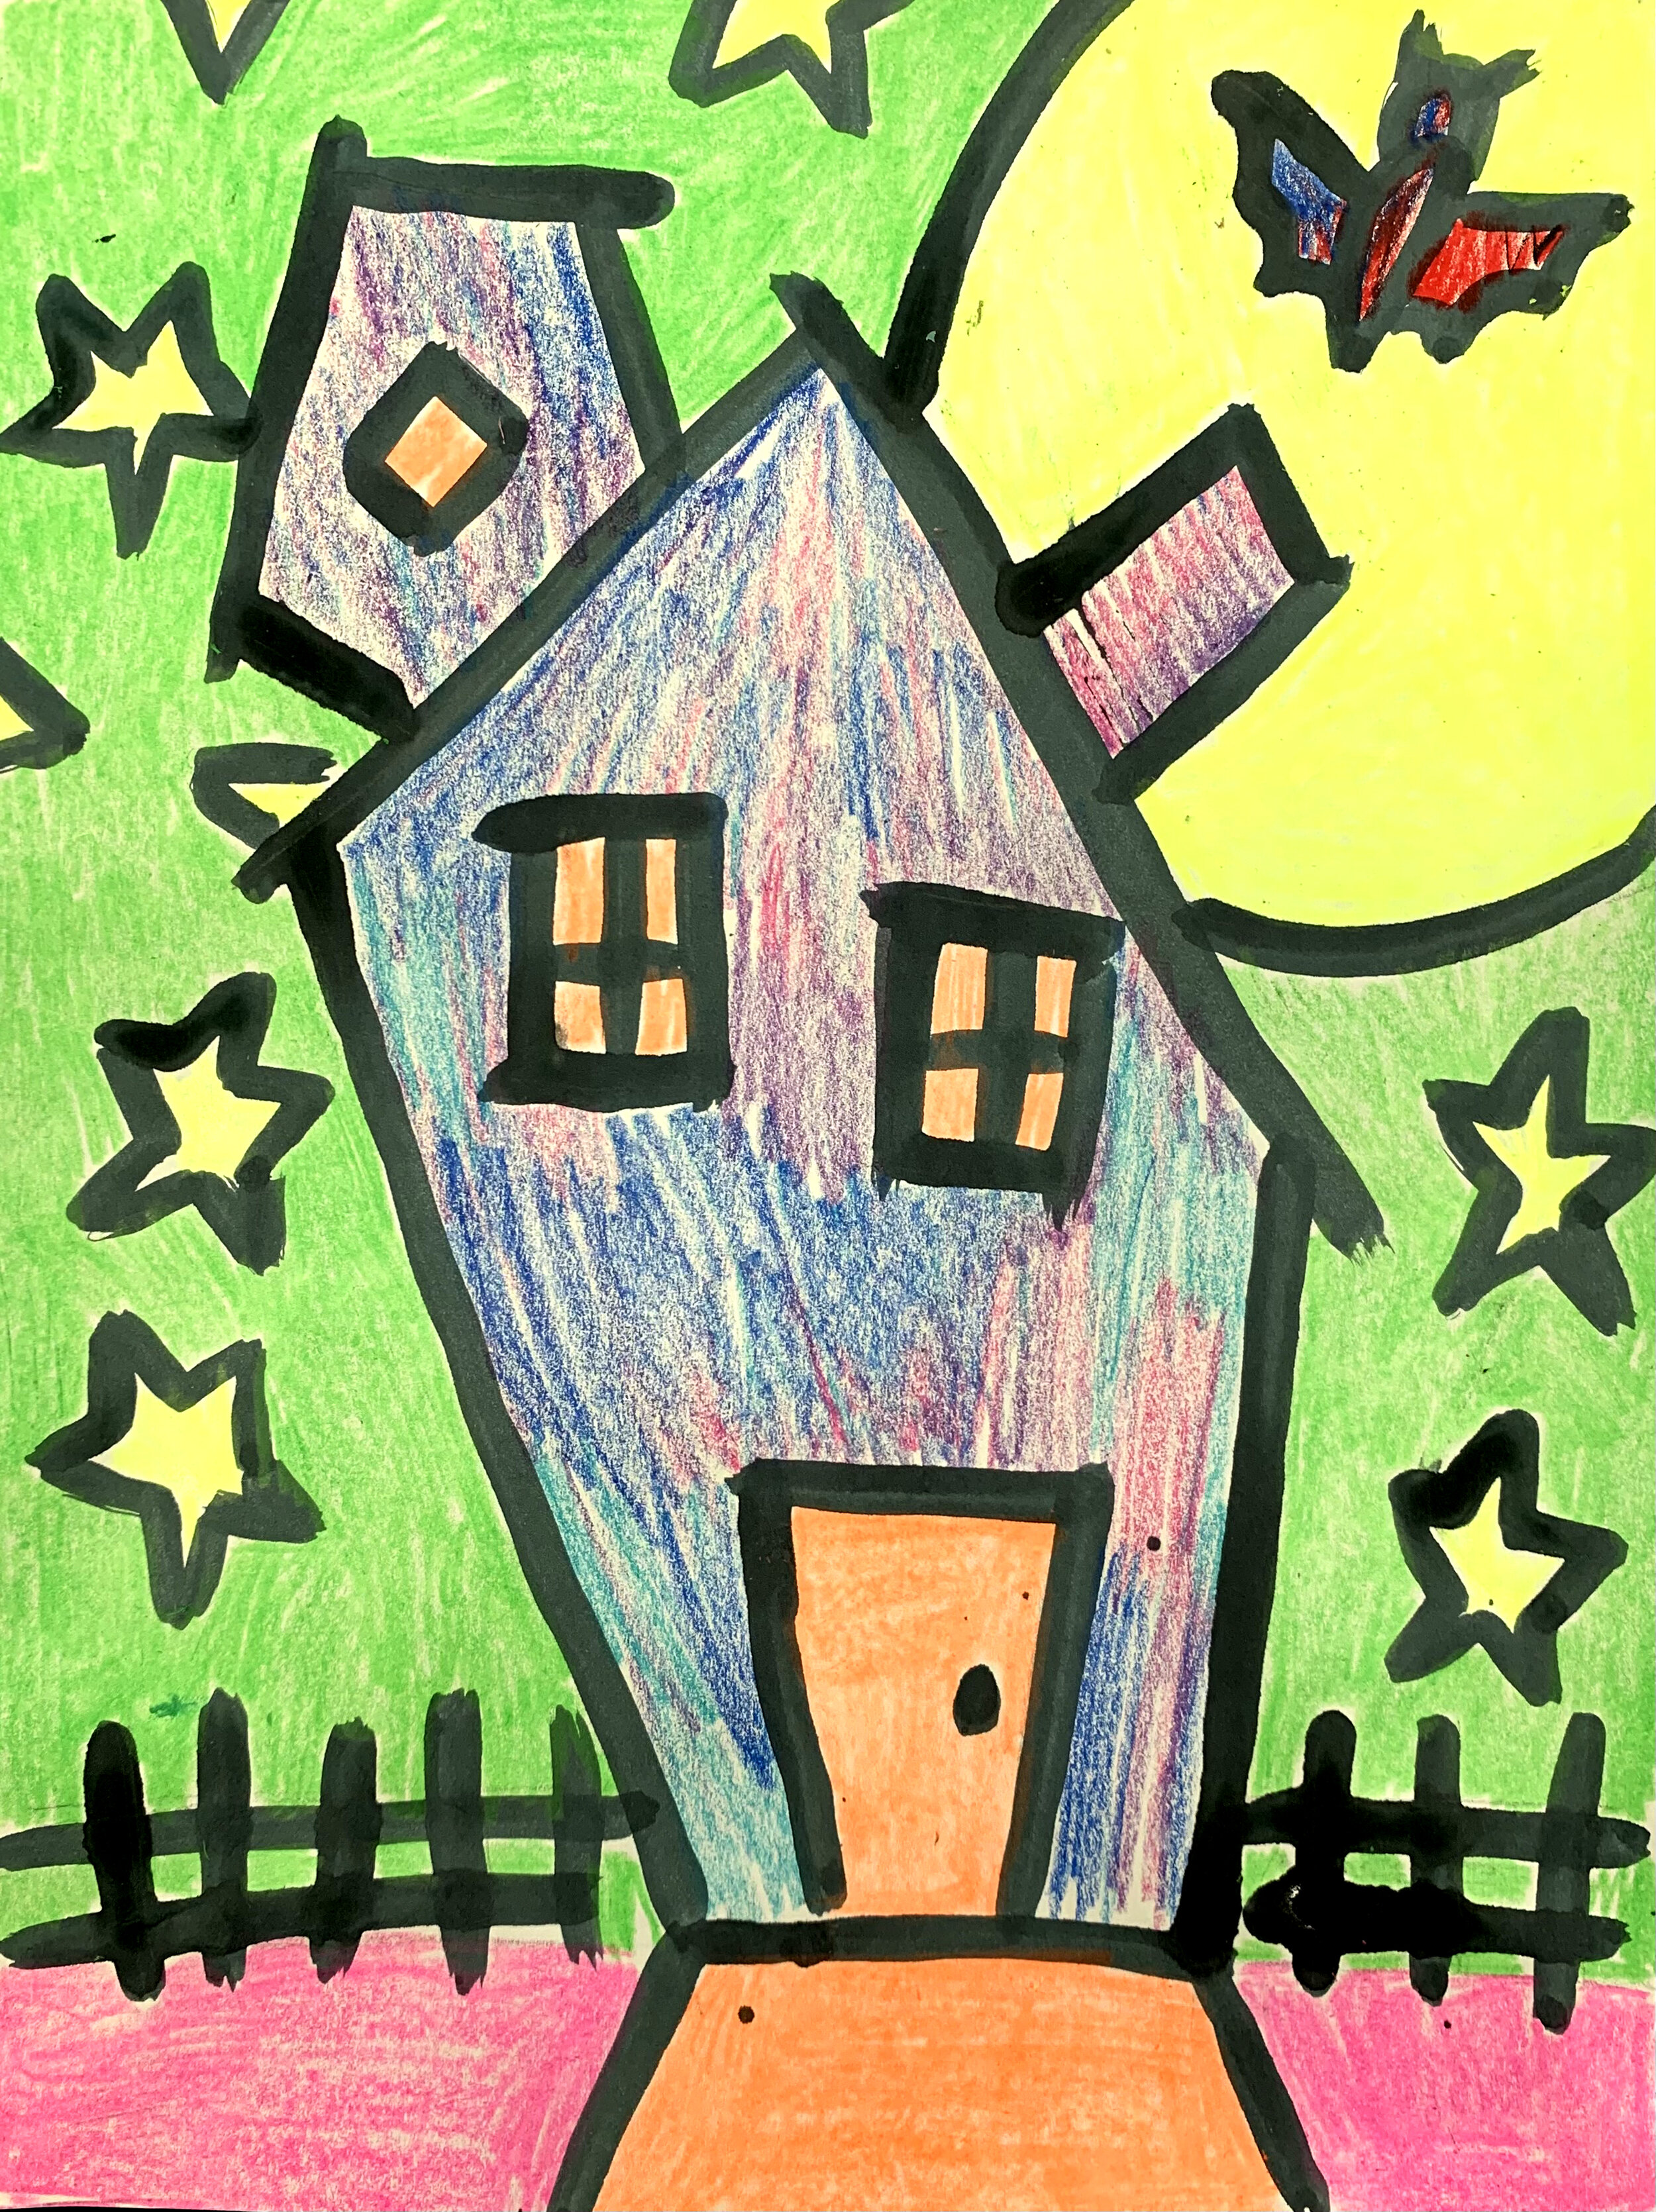
Haunted House
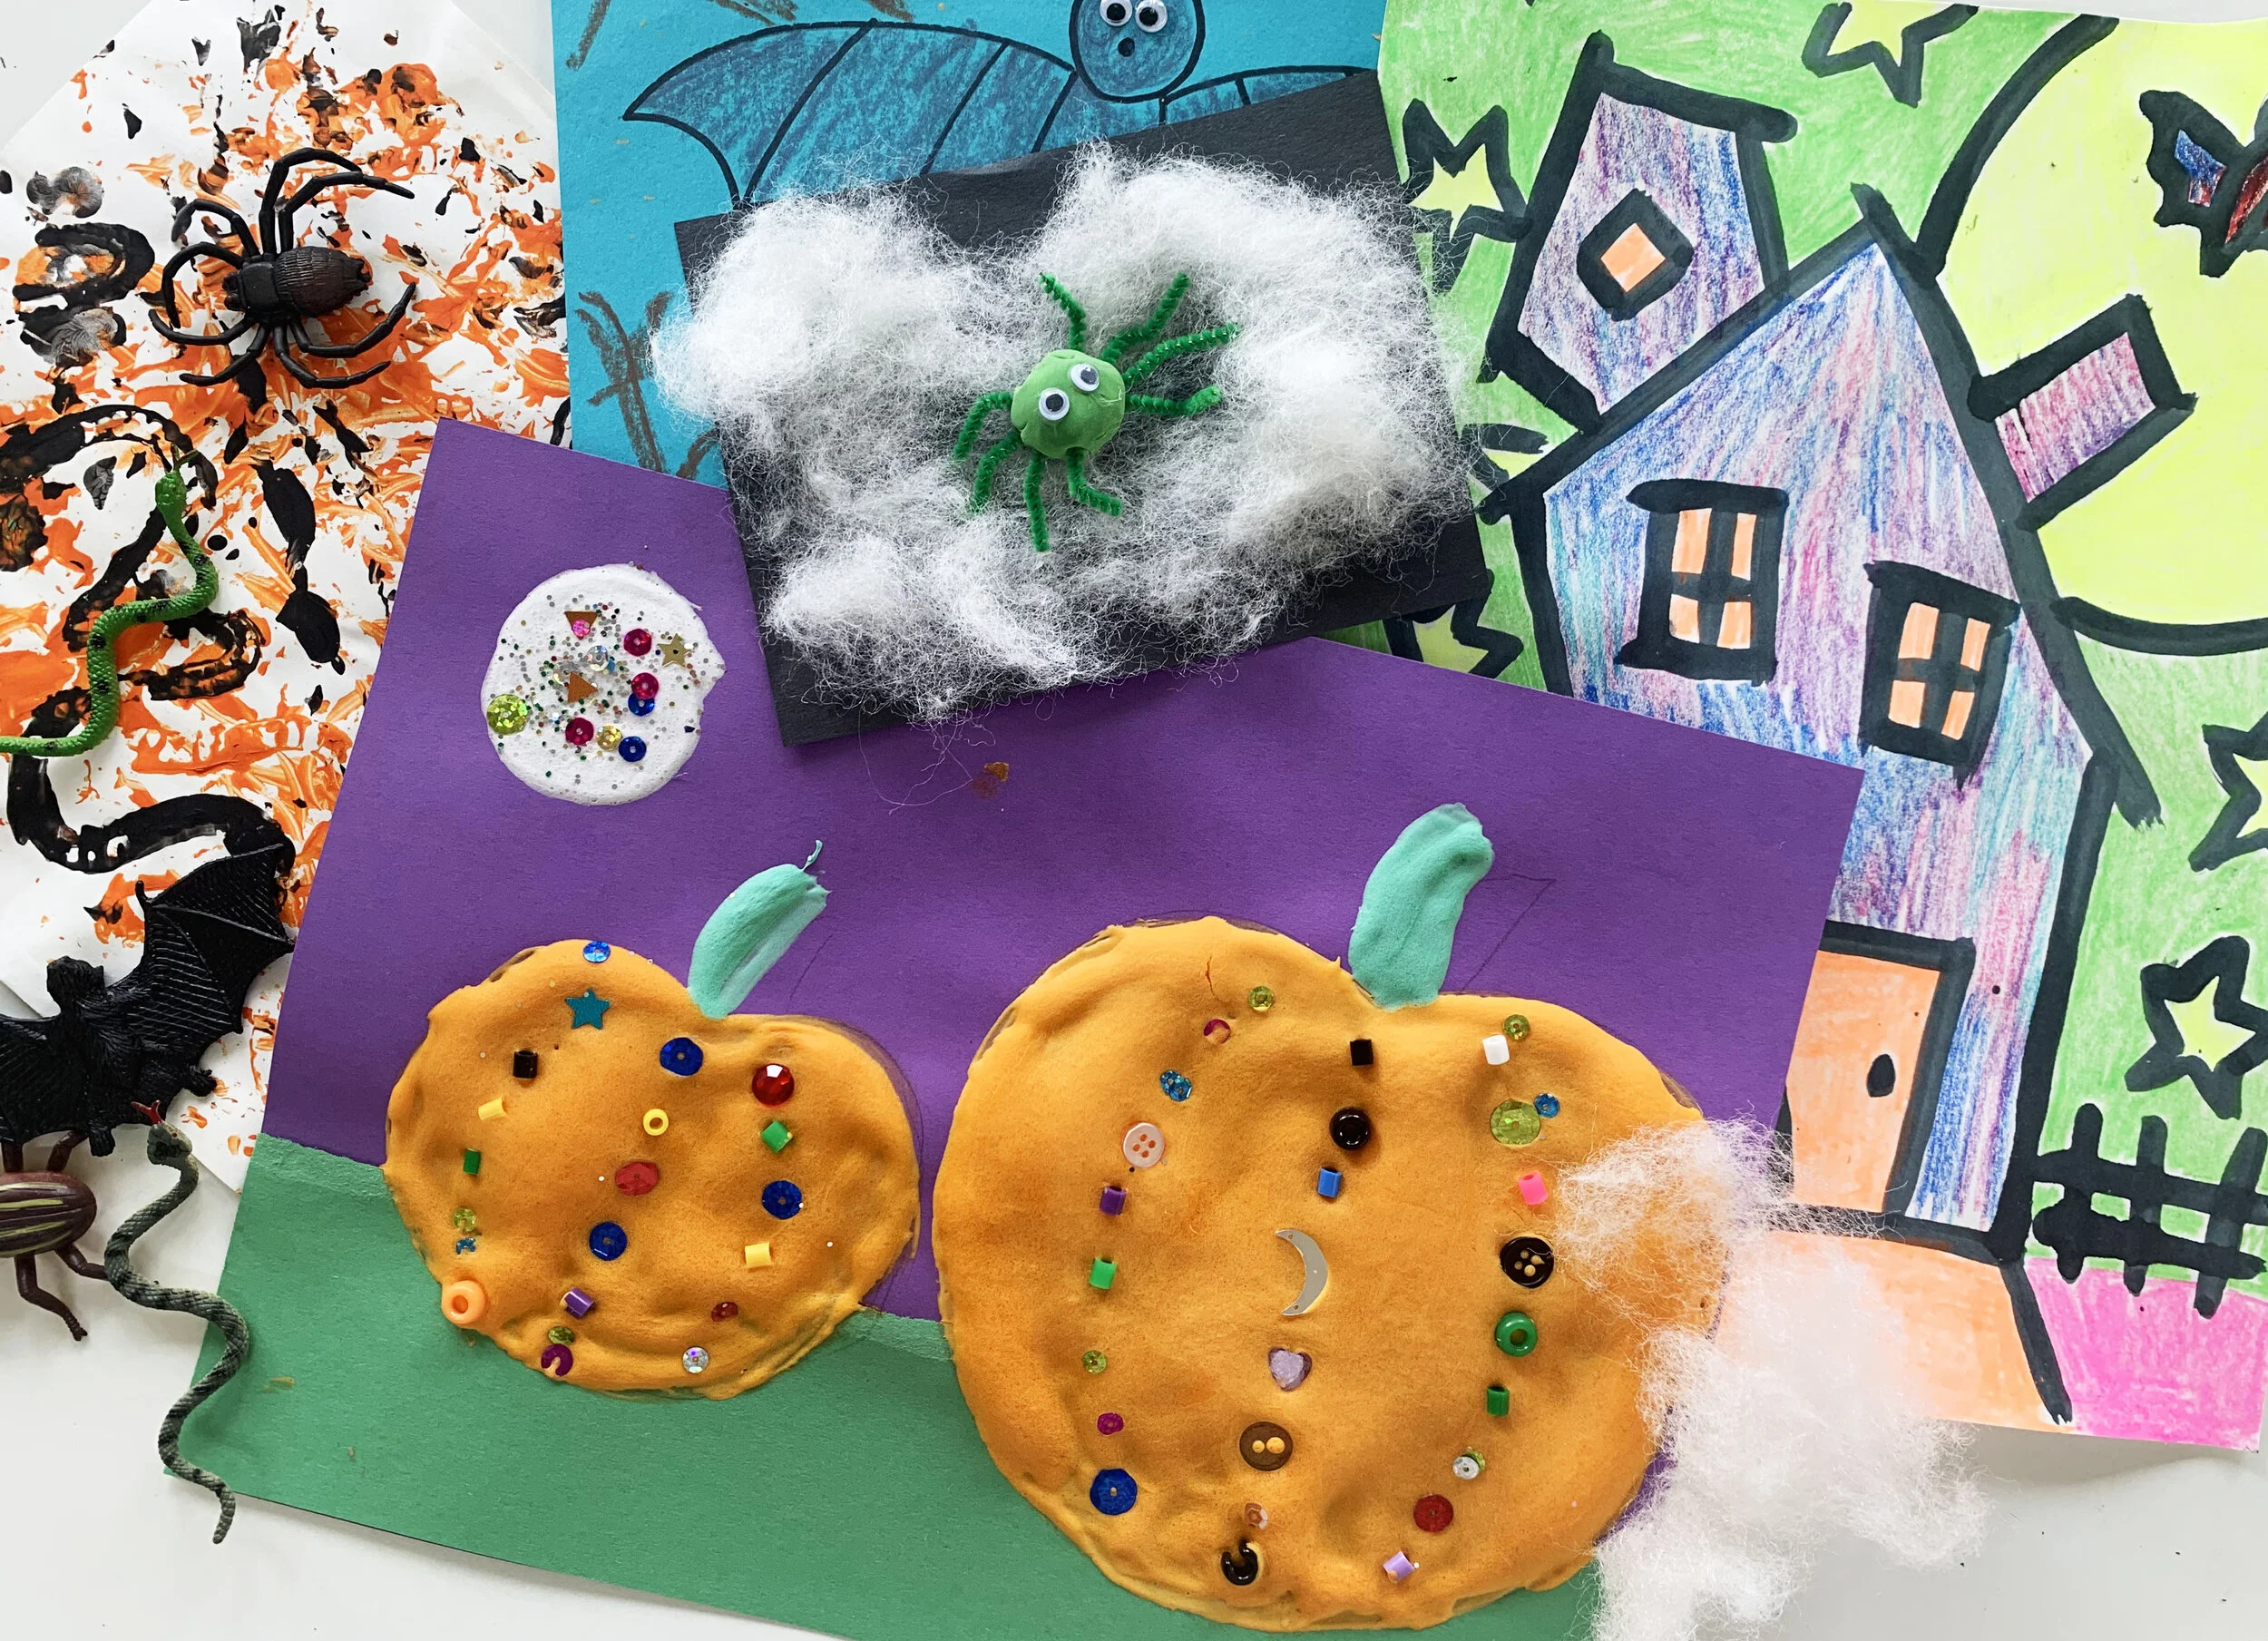
Make A Spider

What you’ll need:
Construction paper (you can also use cardstock or cardboard)
Poly-fill stuffing
Wiggle eyes
Instructions:
Create the background/environment for your spider. Glue down white stuffing to a piece of construction paper.
Roll Model Magic clay into a ball.
Glue wiggly eyes to your spider.
Use pipe cleaners to create the spider’s legs. *Tip: after you stick the legs into the ball of clay, add a little glue to make sure they are nice and secure.
Glue your spider to the paper and allow to dry. Model Magic clay will air dry in 24-48 hours.
*Extra Project Idea: Did you make multiple spiders? Create a “home” for your spiders using cardboard boxes and other recycled materials. Kids in our studio made a “Spider Hotel” - see below picture!
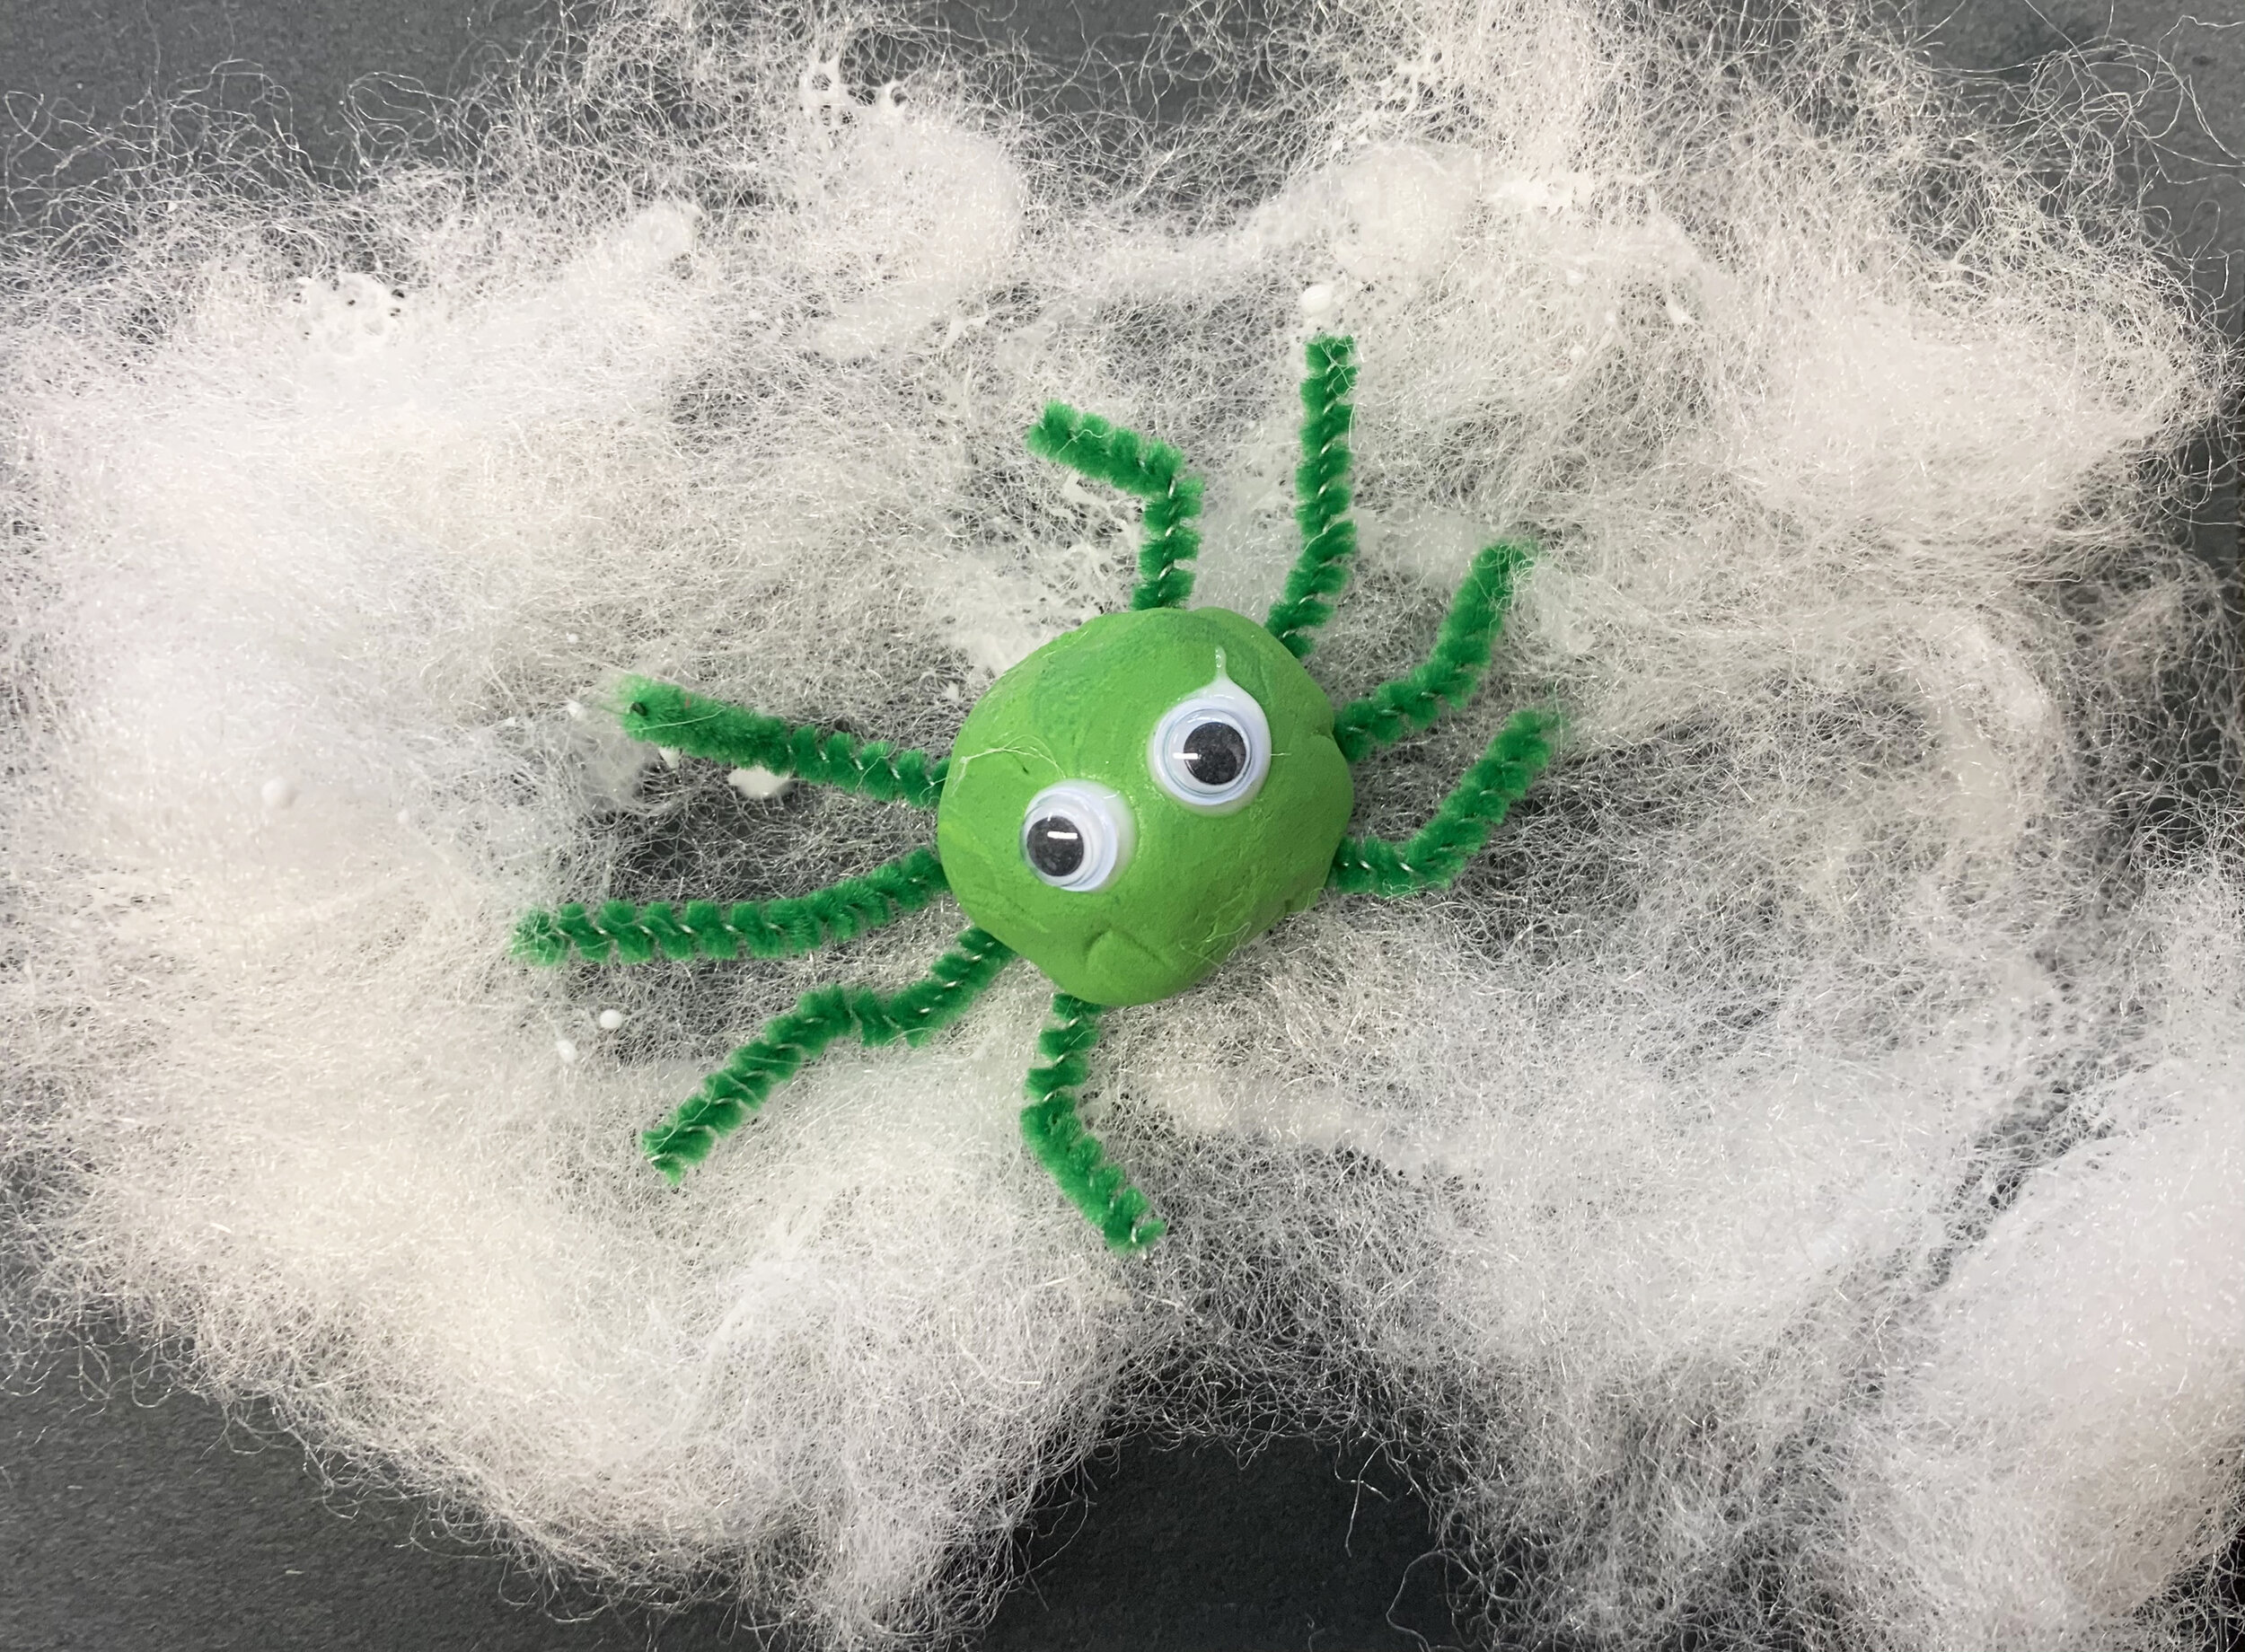
Model Magic spider

Fun spiders made by kids in the studio
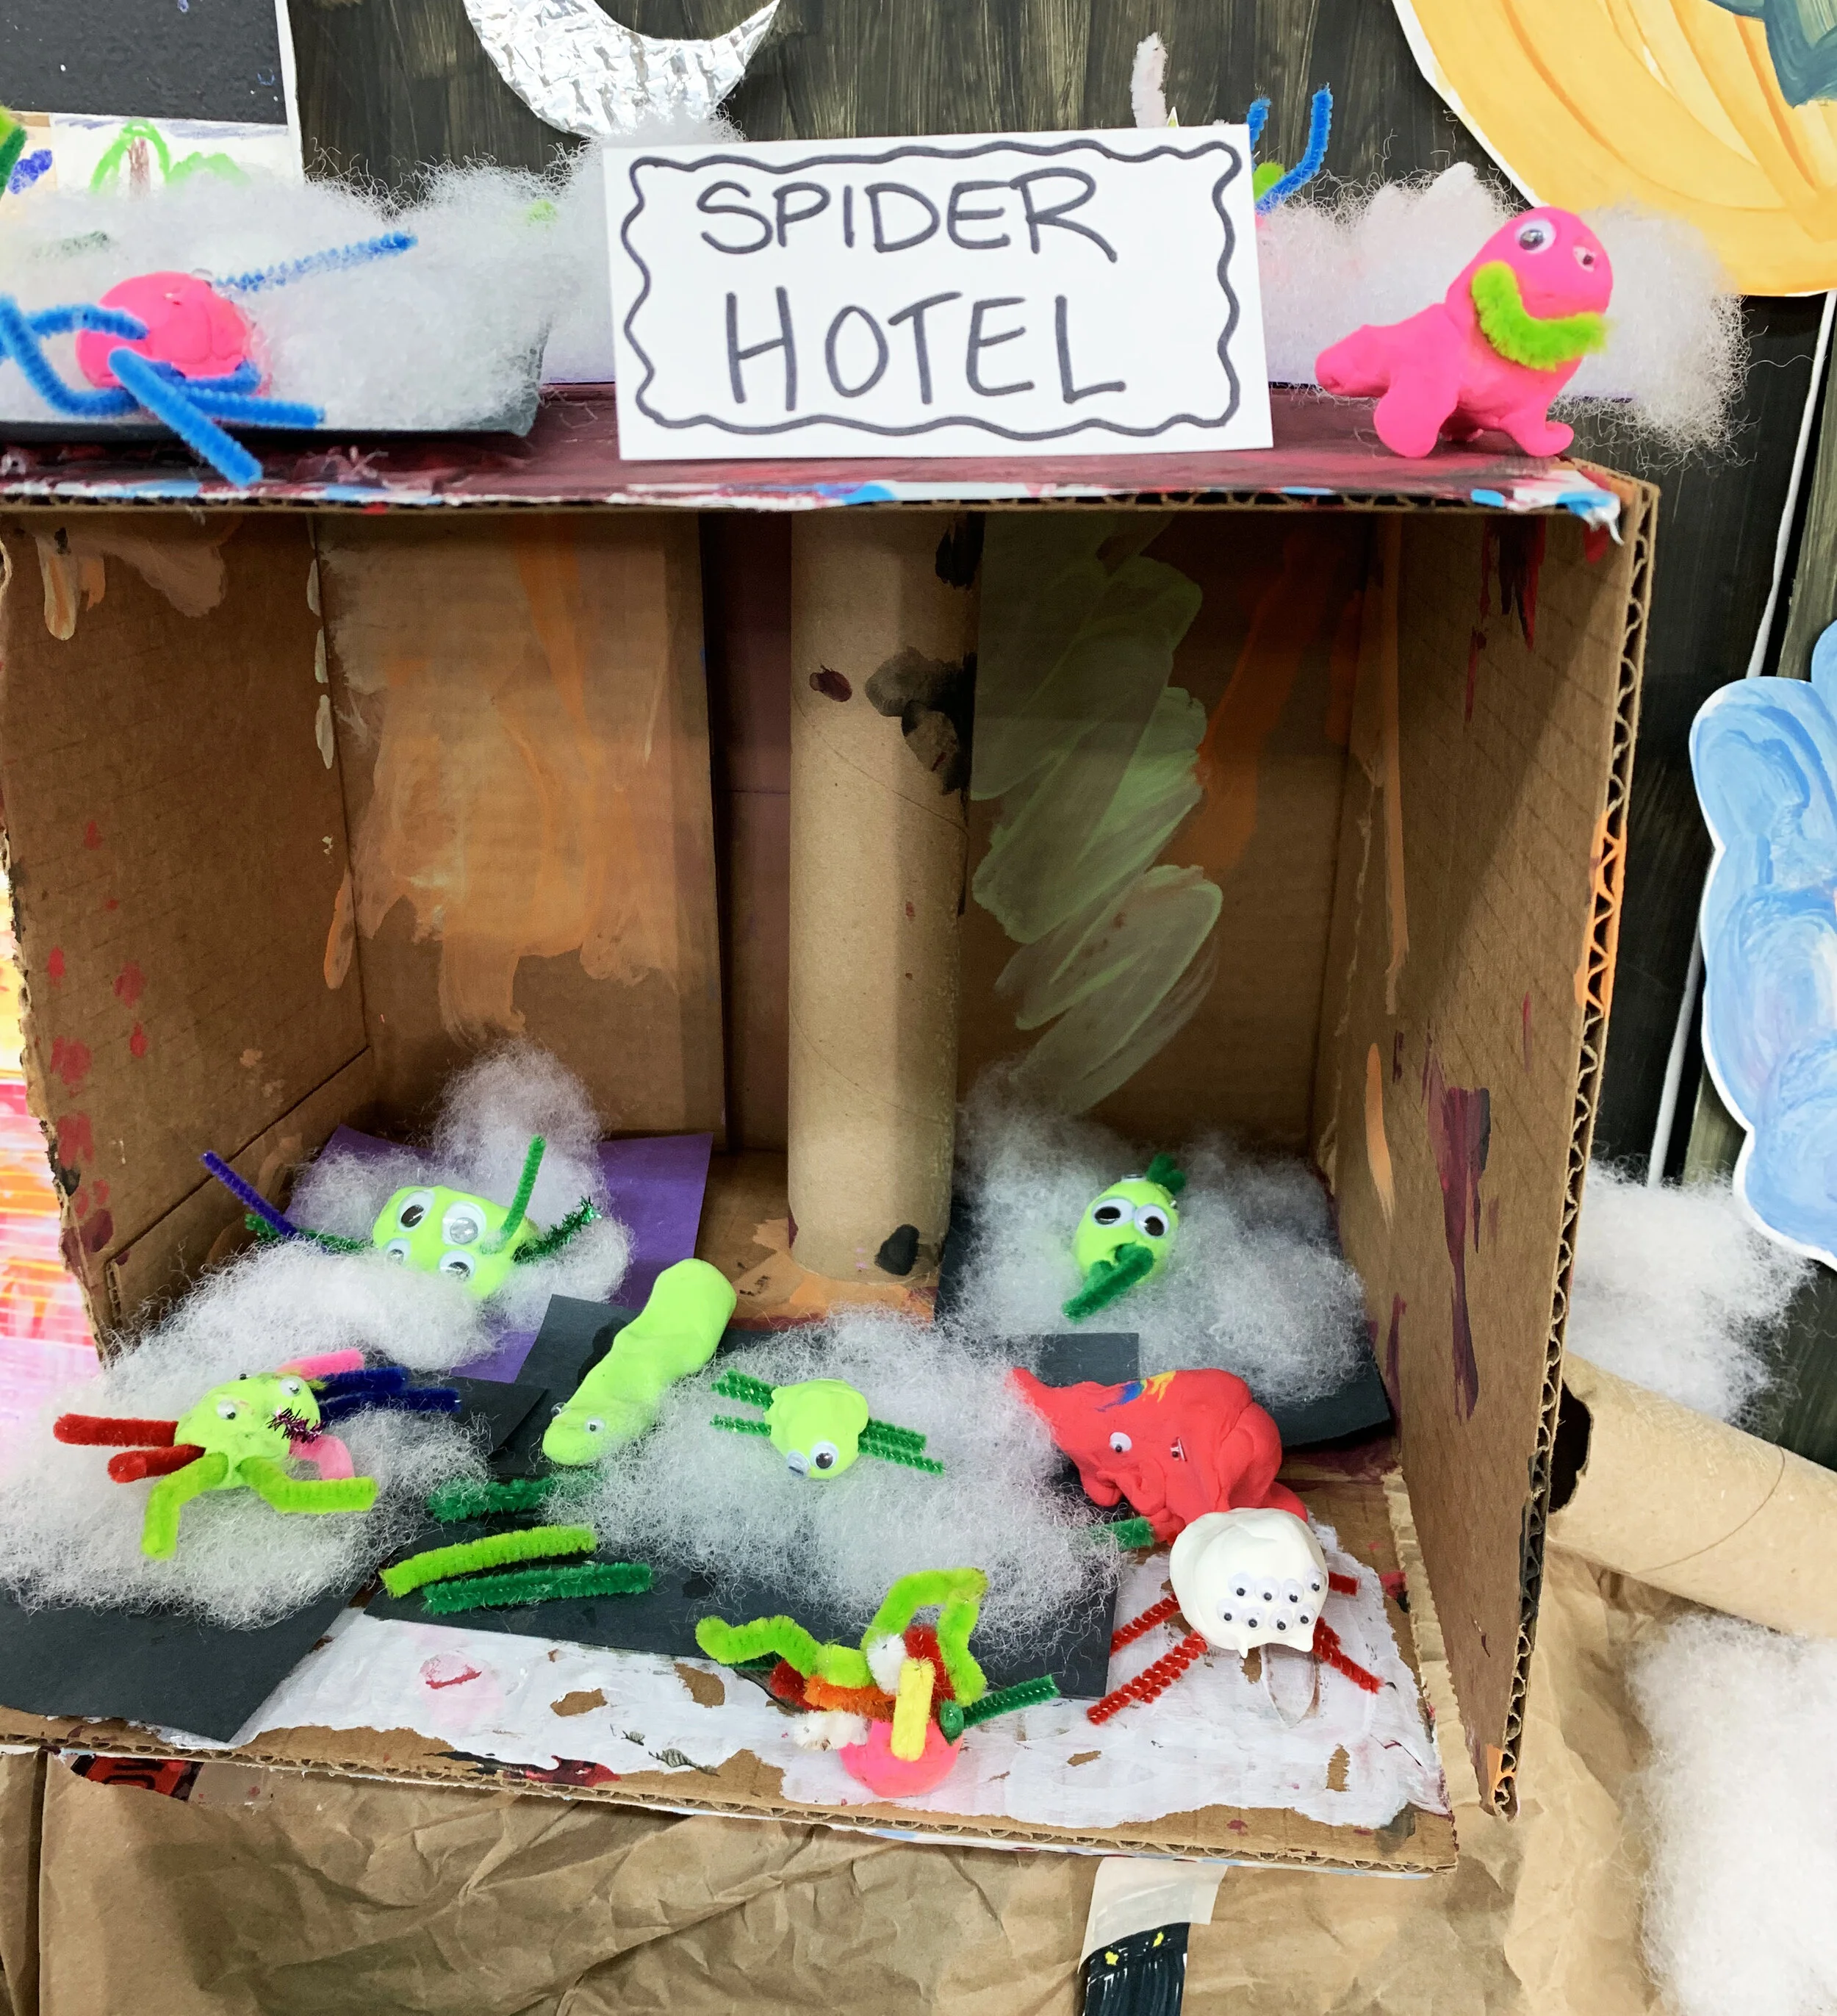
“Spider Hotel” made by kids in the studio

Puffy Pumpkins
What You’ll Need:
Shaving cream
Liquid watercolor or food coloring
Construction paper
Glue stick
Assorted beads, buttons, sequins and/or glitter
3 plastic cups to mix your paint - we like these but you can also use baby food jars or any tupperware you may have on hand. Make sure to use something that is resealable if you want to use your paint more than once!
Instructions:
Make “puffy” paint. Mix equal parts shaving cream and glue. Add liquid watercolor or food color to make desired colors. For this project, we suggest mixing orange, green and leaving one cup white.
Create your background. Tear a piece of green construction paper to create the grass. Glue it down using a glue stick.
Paint your pumpkins using “puffy” paint. Be sure to apply it very thick as it will dry puffy.
Decorate your pumpkin by sticking sequins, beads, buttons, glitter, etc. into the puffy paint.
Add any additional details to the sky, such as a moon.
Allow puffy paint to dry.

Puffy Pumpkins

Draw Bats

What You’ll Need:
Construction paper
Construction Paper Crayons (oil pastels would also work)
Instructions:
Sketch your bat using a pencil/eraser. Create your own or use our step-by-step guide.
Outline your pencil marks with a black permanent marker.
Color in your bat using crayons or oil pastels. Don’t forget to draw elements in the background. Create an environment for your bat.
Add wiggle eyes using glue.

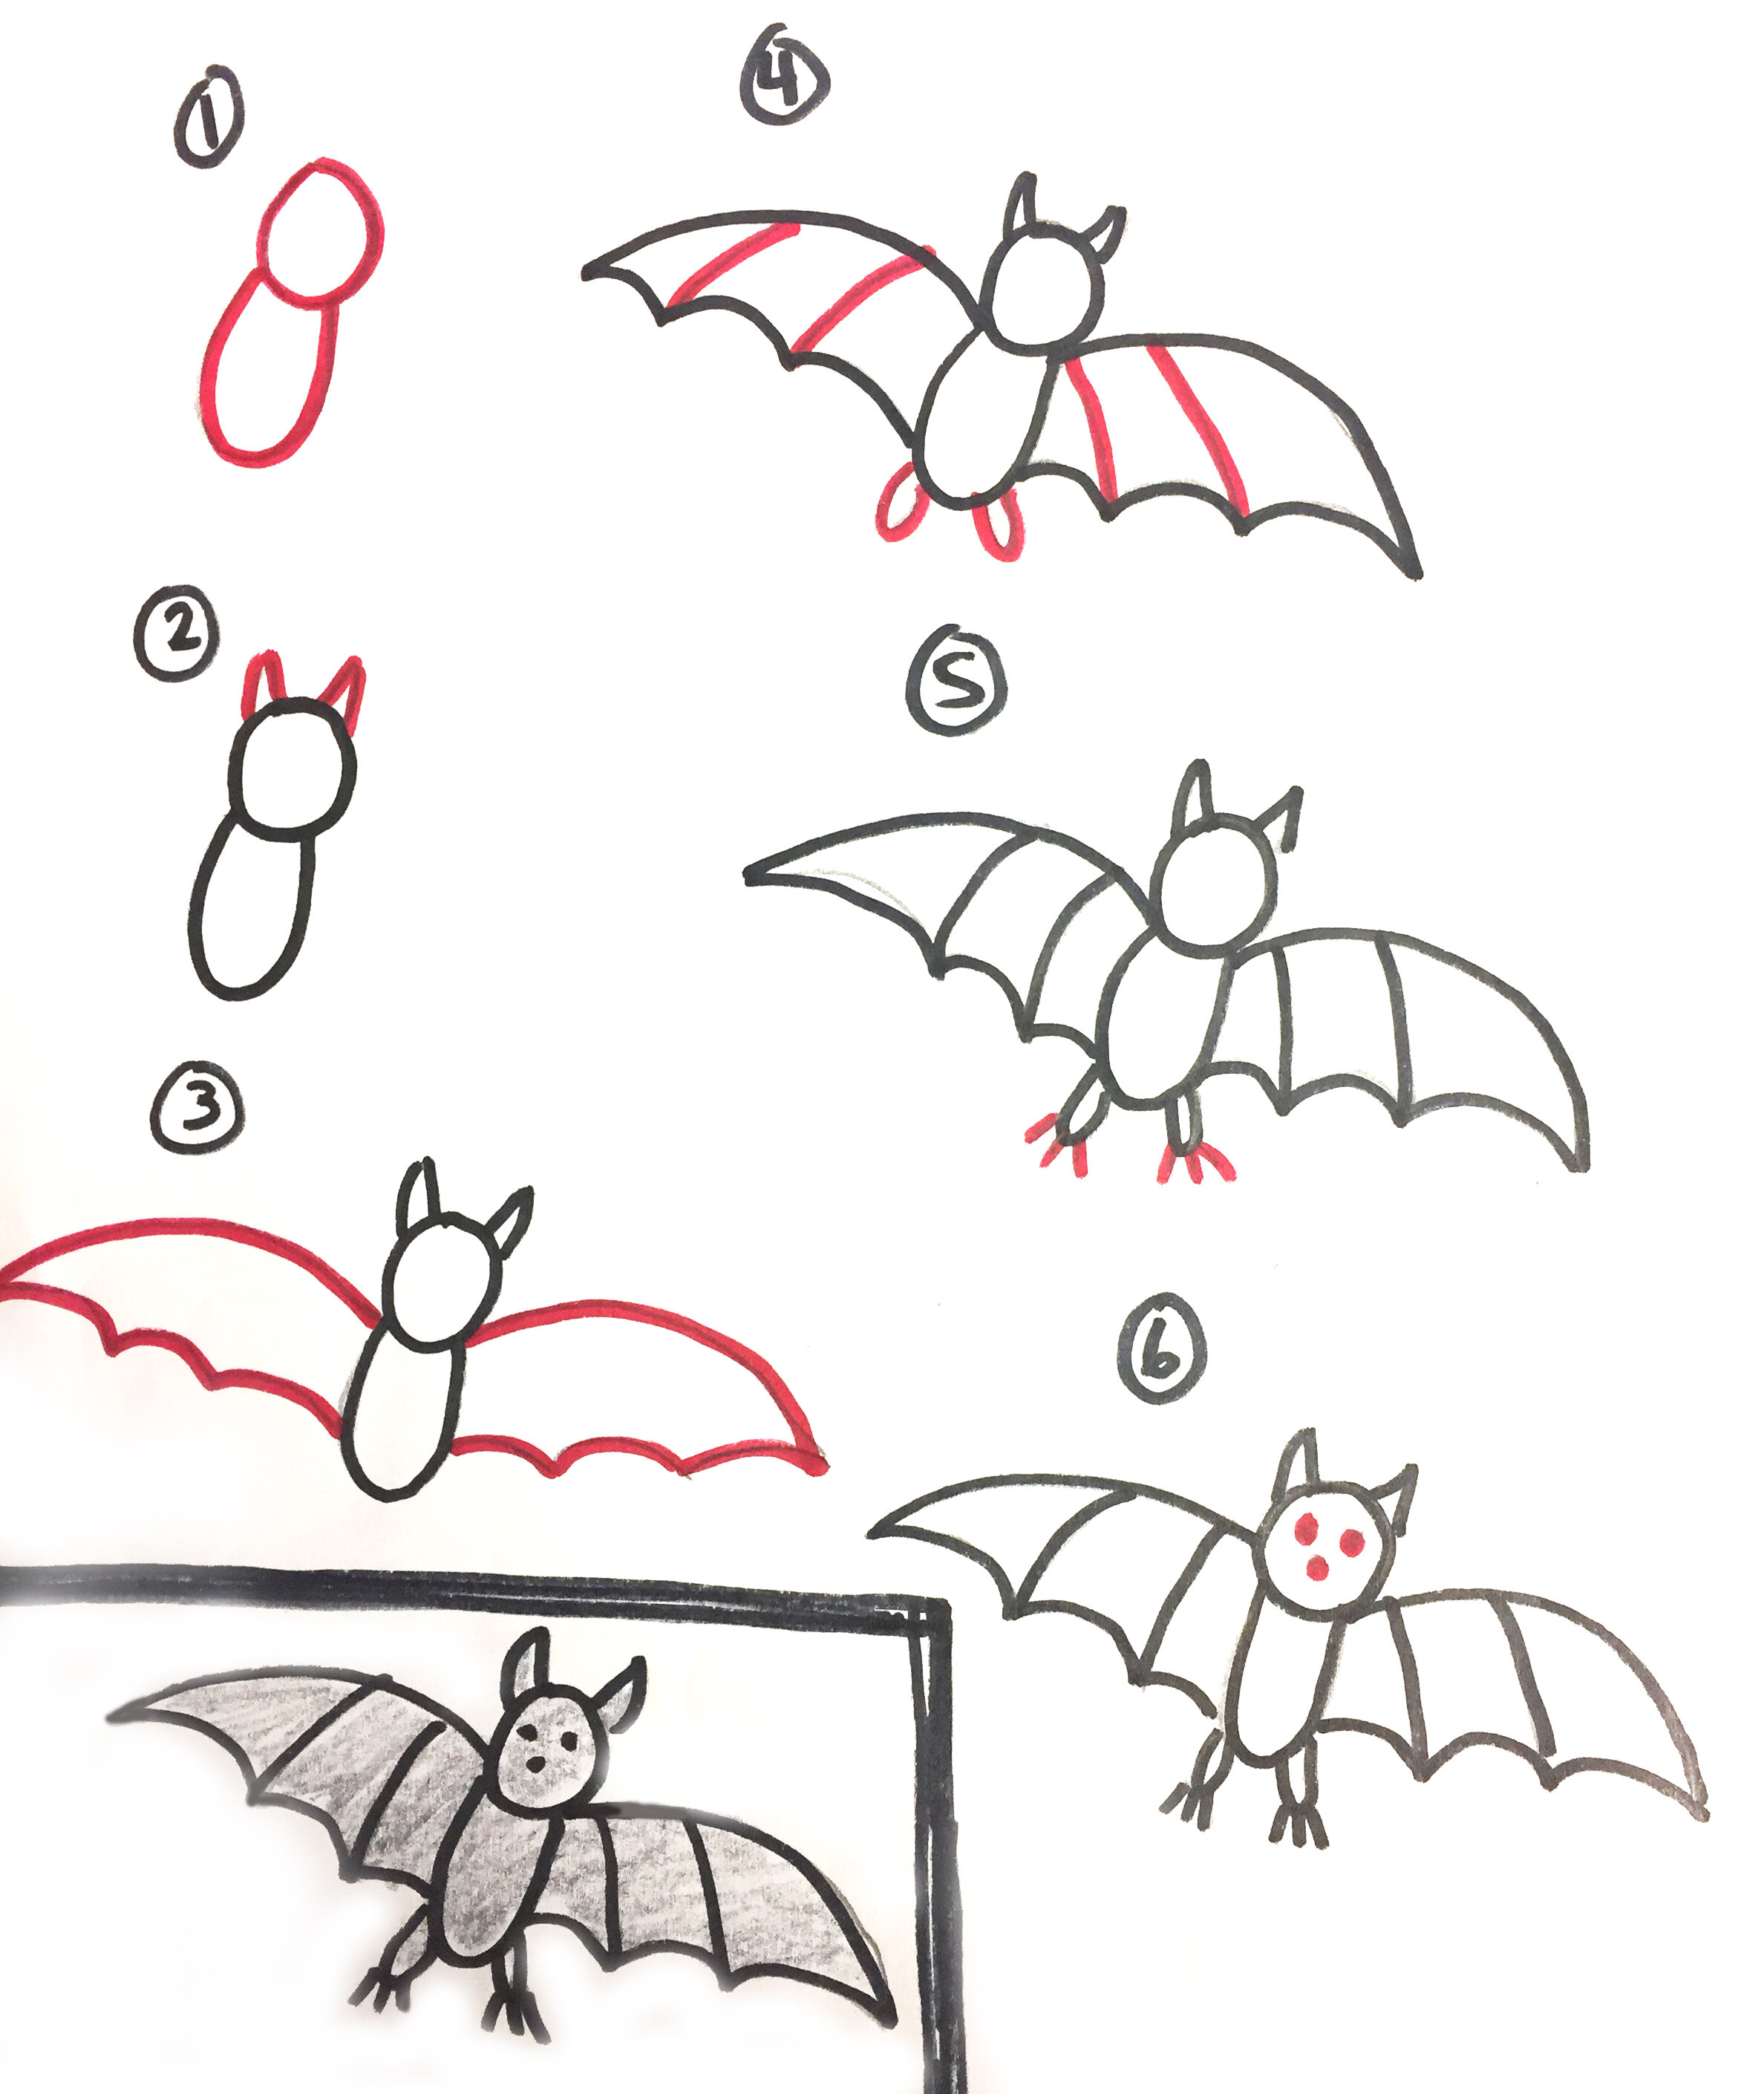
Step-by-step how to draw a bat
Spooky Fingerpainting

What You’ll Need:
Washable paint or fingerpaint. Crayola brand is our favorite because it is truly washable. Some brands sometimes stain kids skin! It is also non-toxic which is important if you have a baby who likes to put things in his or her mouth.
Paper
Paint rag (for cleanup)
Toy spiders, snakes and scorpions
Tray or container to pour the paint
Instructions:
Dip your spider/snakes into fingerpaint. Stamp it on your paper.
Experiment with different colors and textures and see how many different types of marks you can make on your paper.
Remember, this project is more about the process and having fun than the end product!
*To learn more about process art, check out our blog post HERE!

Spooky fingerpainting
Halloween Sensory Play
Sensory play is so great for kids of all ages. It can help to build fine motor skills, get kids used to different textures, help relax kids, build problem solving and provide endless hours of entertainment. Halloween is the perfect time to set up lots of ooey, gooey, spooky sensory play activities! While we didn’t invent any of these recipes or ideas, we’ve spent the last 5 years tinkering with lots of recipes and testing with lots of kids to come up with our favorites!
Oobleck
Oobleck is a simple (and easier to clean) alternative to slime making. It is fun for kids to see a solid changing into a liquid right before their eyes.
What You’ll Need:
Water
Cornstarch
Mixing bowl - you can also get something fun like a pumpkin bucket or a witches cauldron!
Plastic animals or insects to play with in the Oobleck (we love these animals by Learning Resources for sensory play and painting)
Mixing spoon
Instructions
Pour 1 cup of cornstarch into a bowl.
Add 1 cup of water slowly to the corn starch and mix. The cornstarch will turn into a solid. Add more cornstarch if it gets too runny. Add more water if it is too thick.
Add food color or liquid watercolor to desired color.
Now you have Oobleck! Get your hands messy and scoop up the solid cornstarch then watch it change to a liquid once you squeeze it. For some fun, imaginative play, dip toy insects or plastic animals in it.

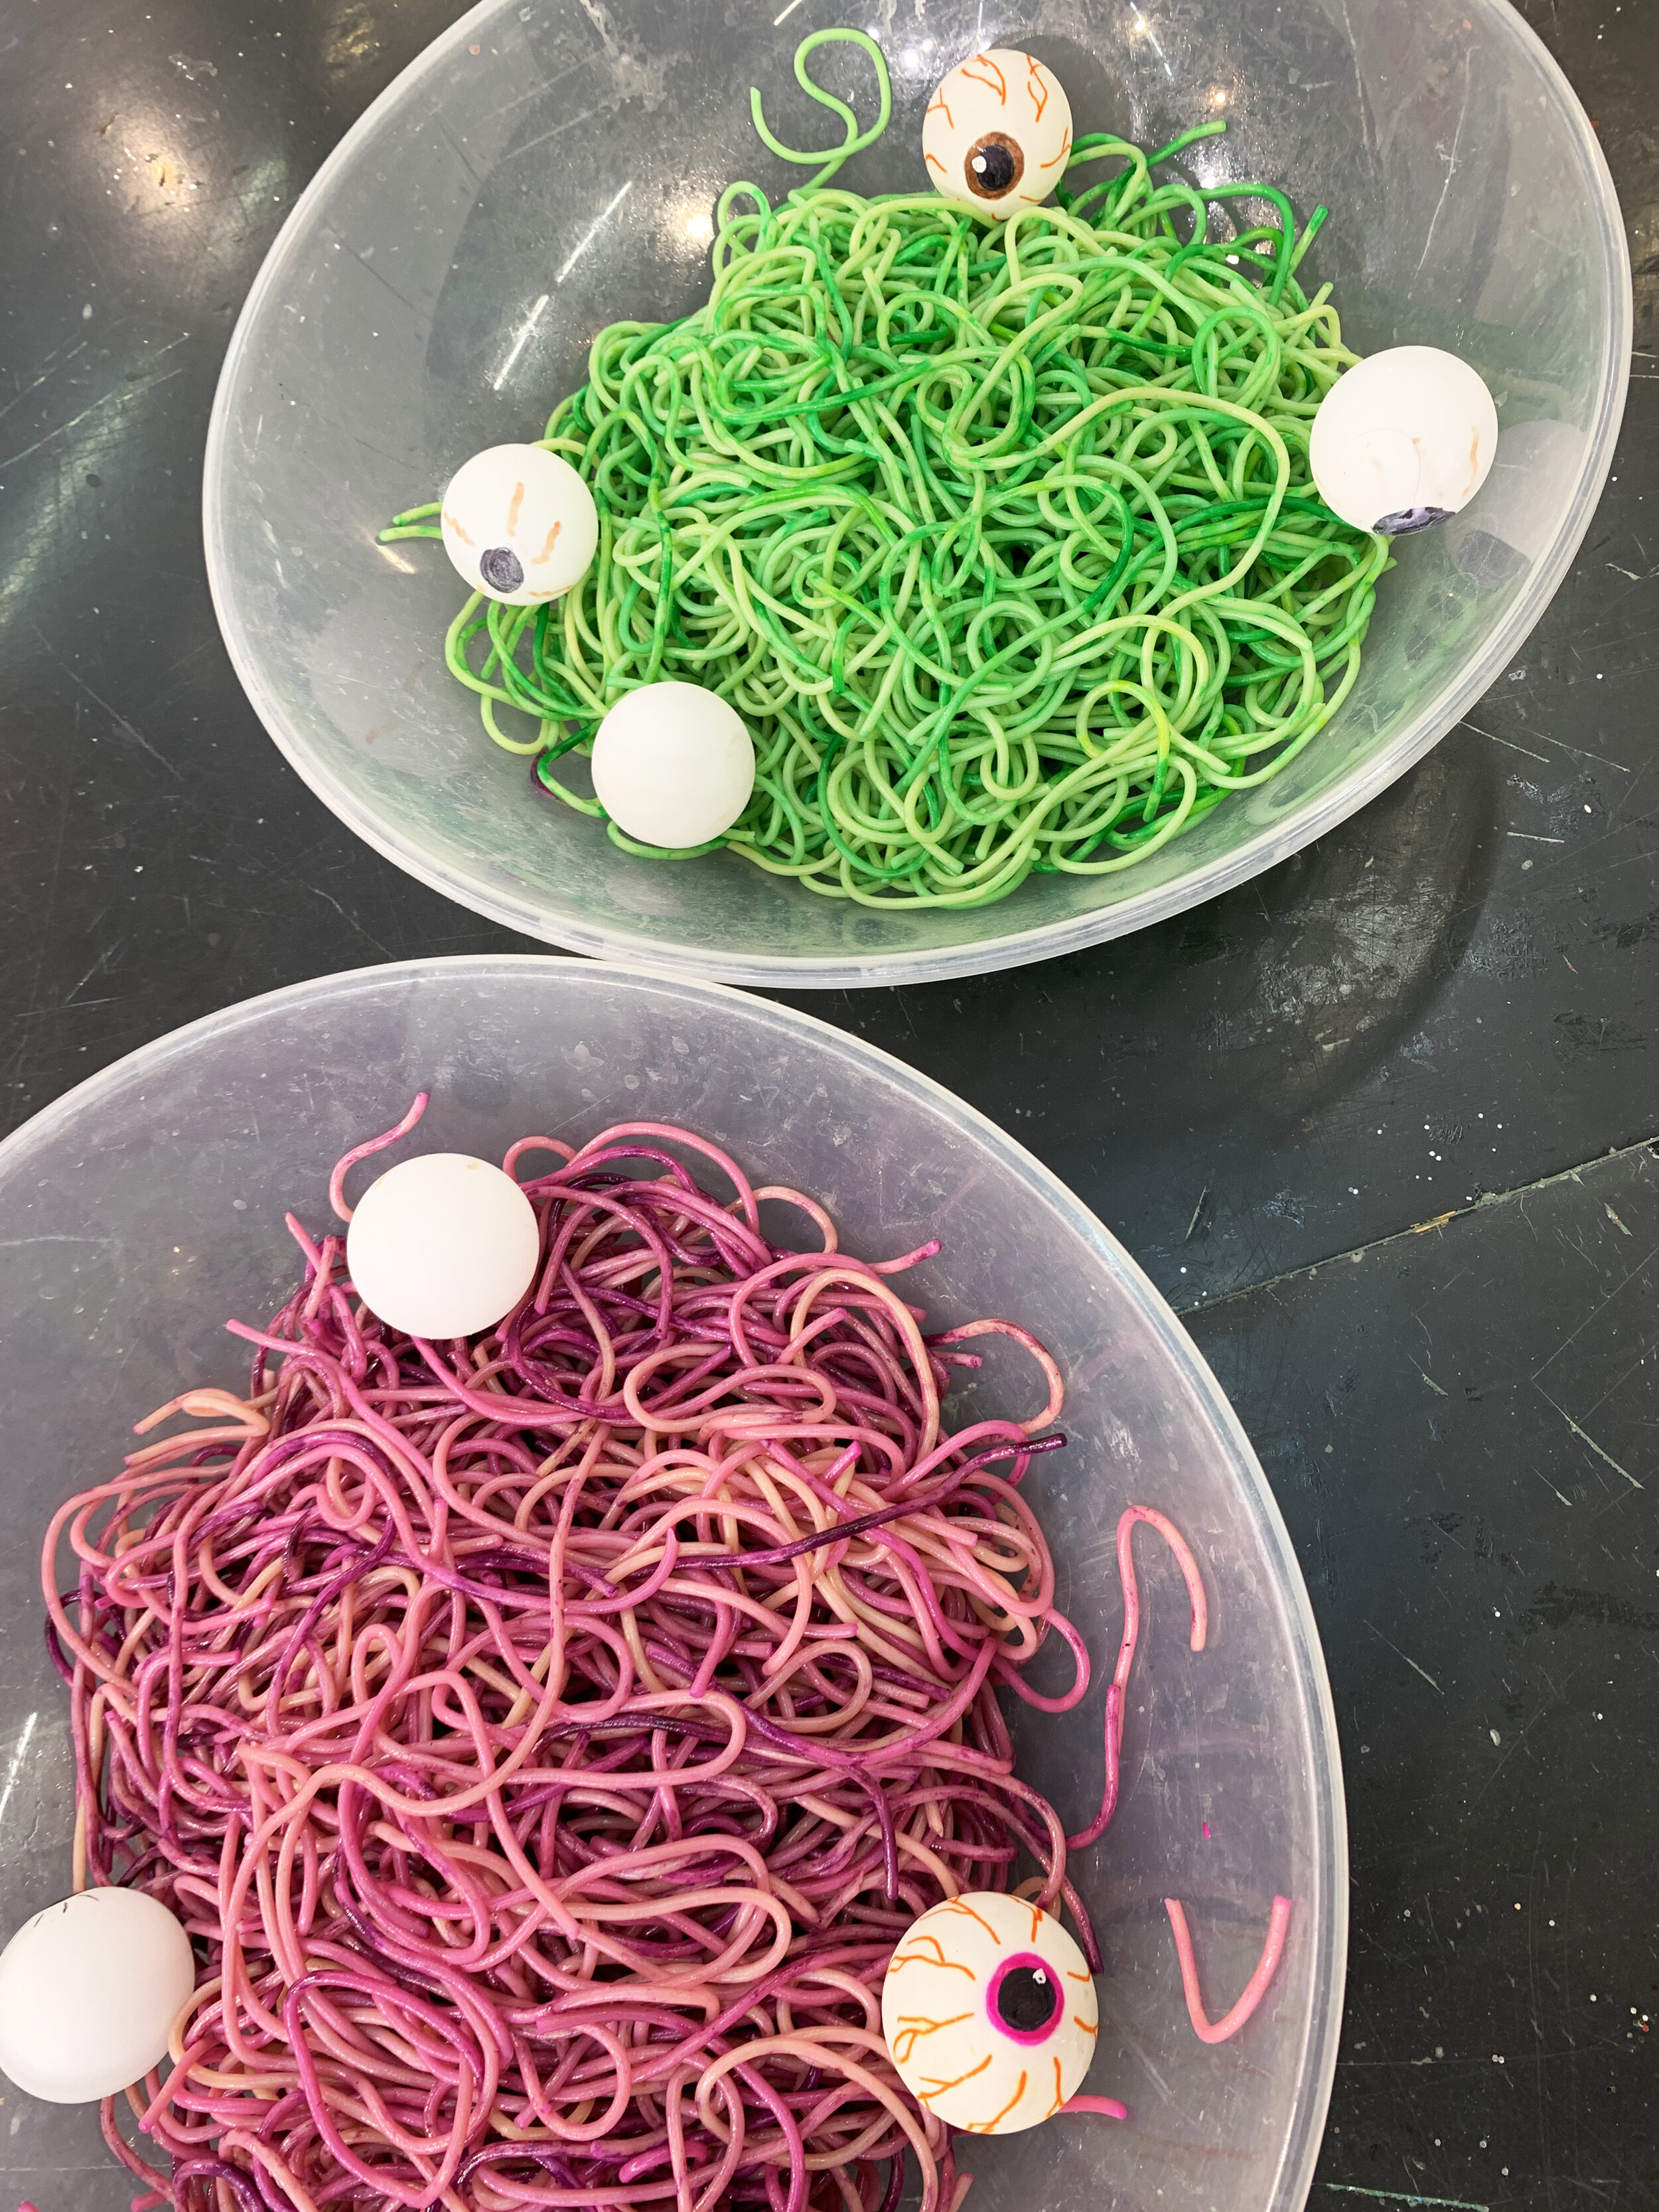
Spaghetti “Brains”
What You’ll Need:
Spaghetti
Vegetable Oil
Food coloring or liquid watercolor
Ping Pong balls
Instructions
Boil spaghetti (per package instructions) and drain.
Rinse spaghetti to allow it to cool. Pour into a mixing bowl.
Add about a tablespoon of vegetable oil - just enough just to coat the spaghetti so it isn’t dry and sticky.
Add a few drops of food coloring or liquid watercolor and mix. Set your spaghetti out on a baking tray to dry.
Make “eye balls” using ping pong balls and permanent markers. Use tongs and/or fingers to play.
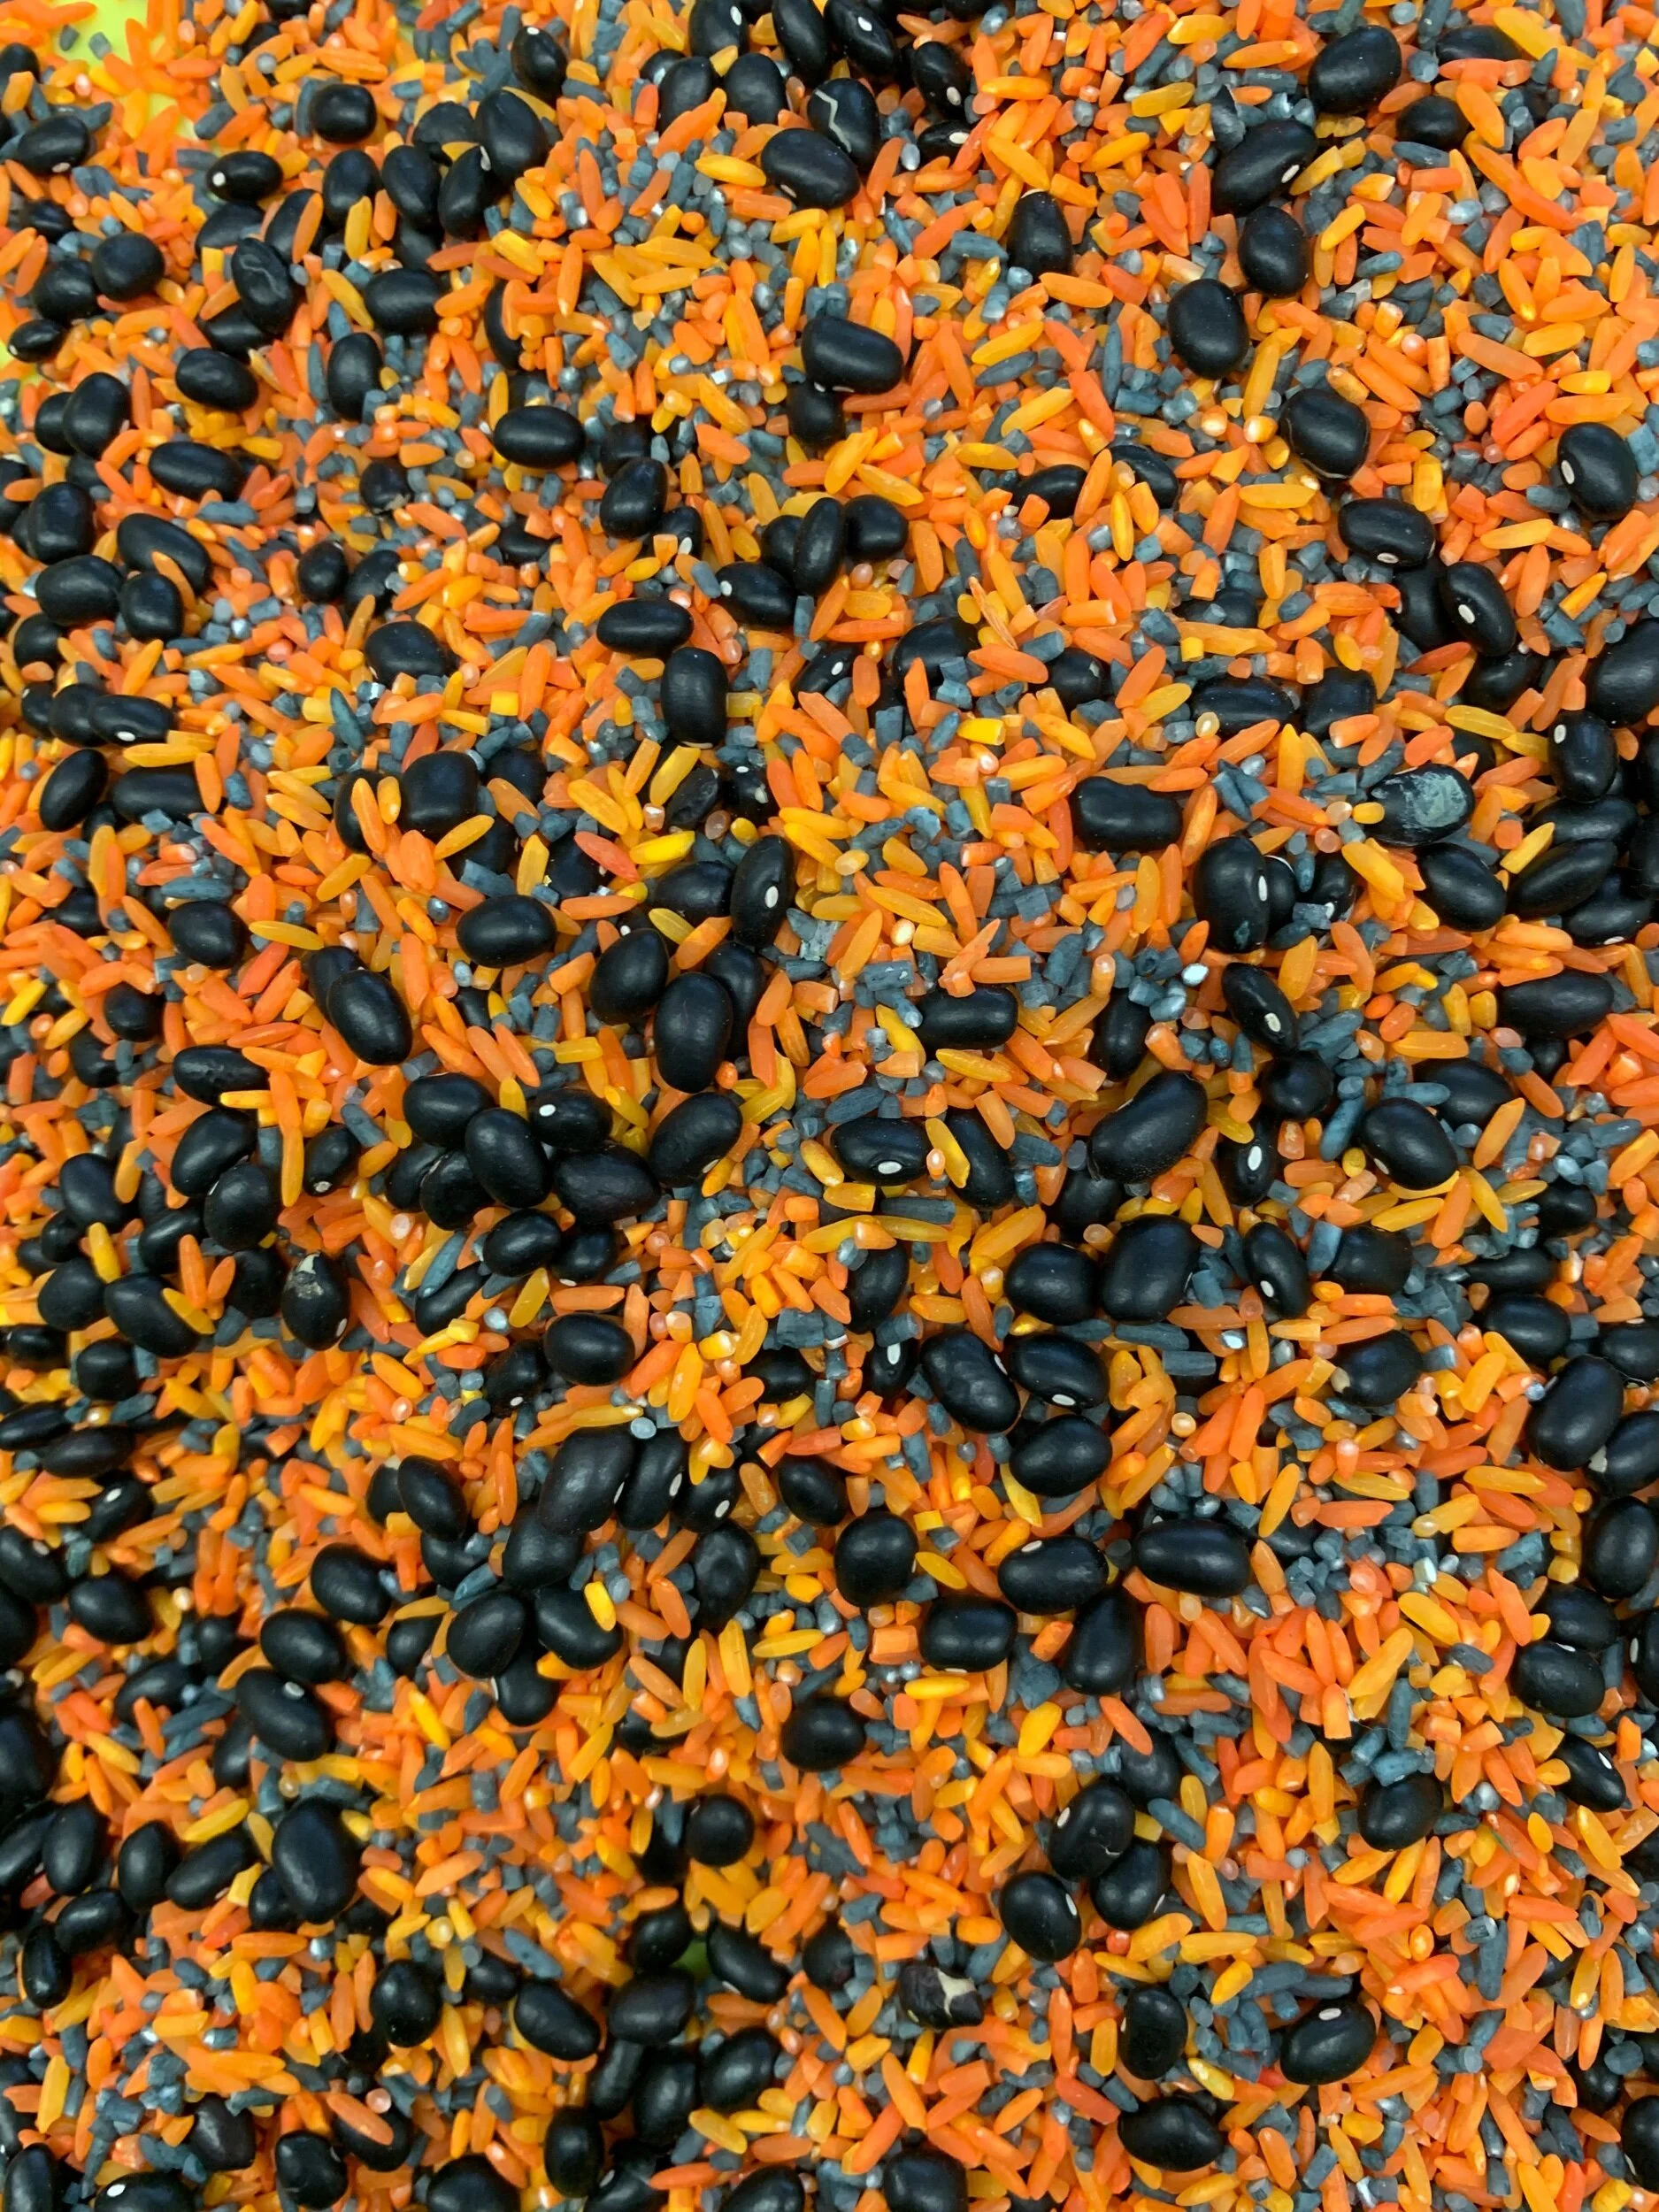
Halloween Rice
What You’ll Need:
Plain rice
White vinegar
Resealable container or baggie
Food color or liquid watercolor
Dried black beans (optional)
Container - large plastic storage tubs work great, especially the ones meant for under the bed storage. Busser tubs are also great for sensory play!
Instructions
Pour 1 cup of white rice into a resealable container or baggie. Add 1 tsp of white vinegar and a few drops of food coloring. Shake until the rice is covered with color.
Pour rice out on a rimmed baking sheet to dry.
Pour rice in your container. and pair with scoopers and tongs. Add dried beans to make “bugs” for some extra fun.
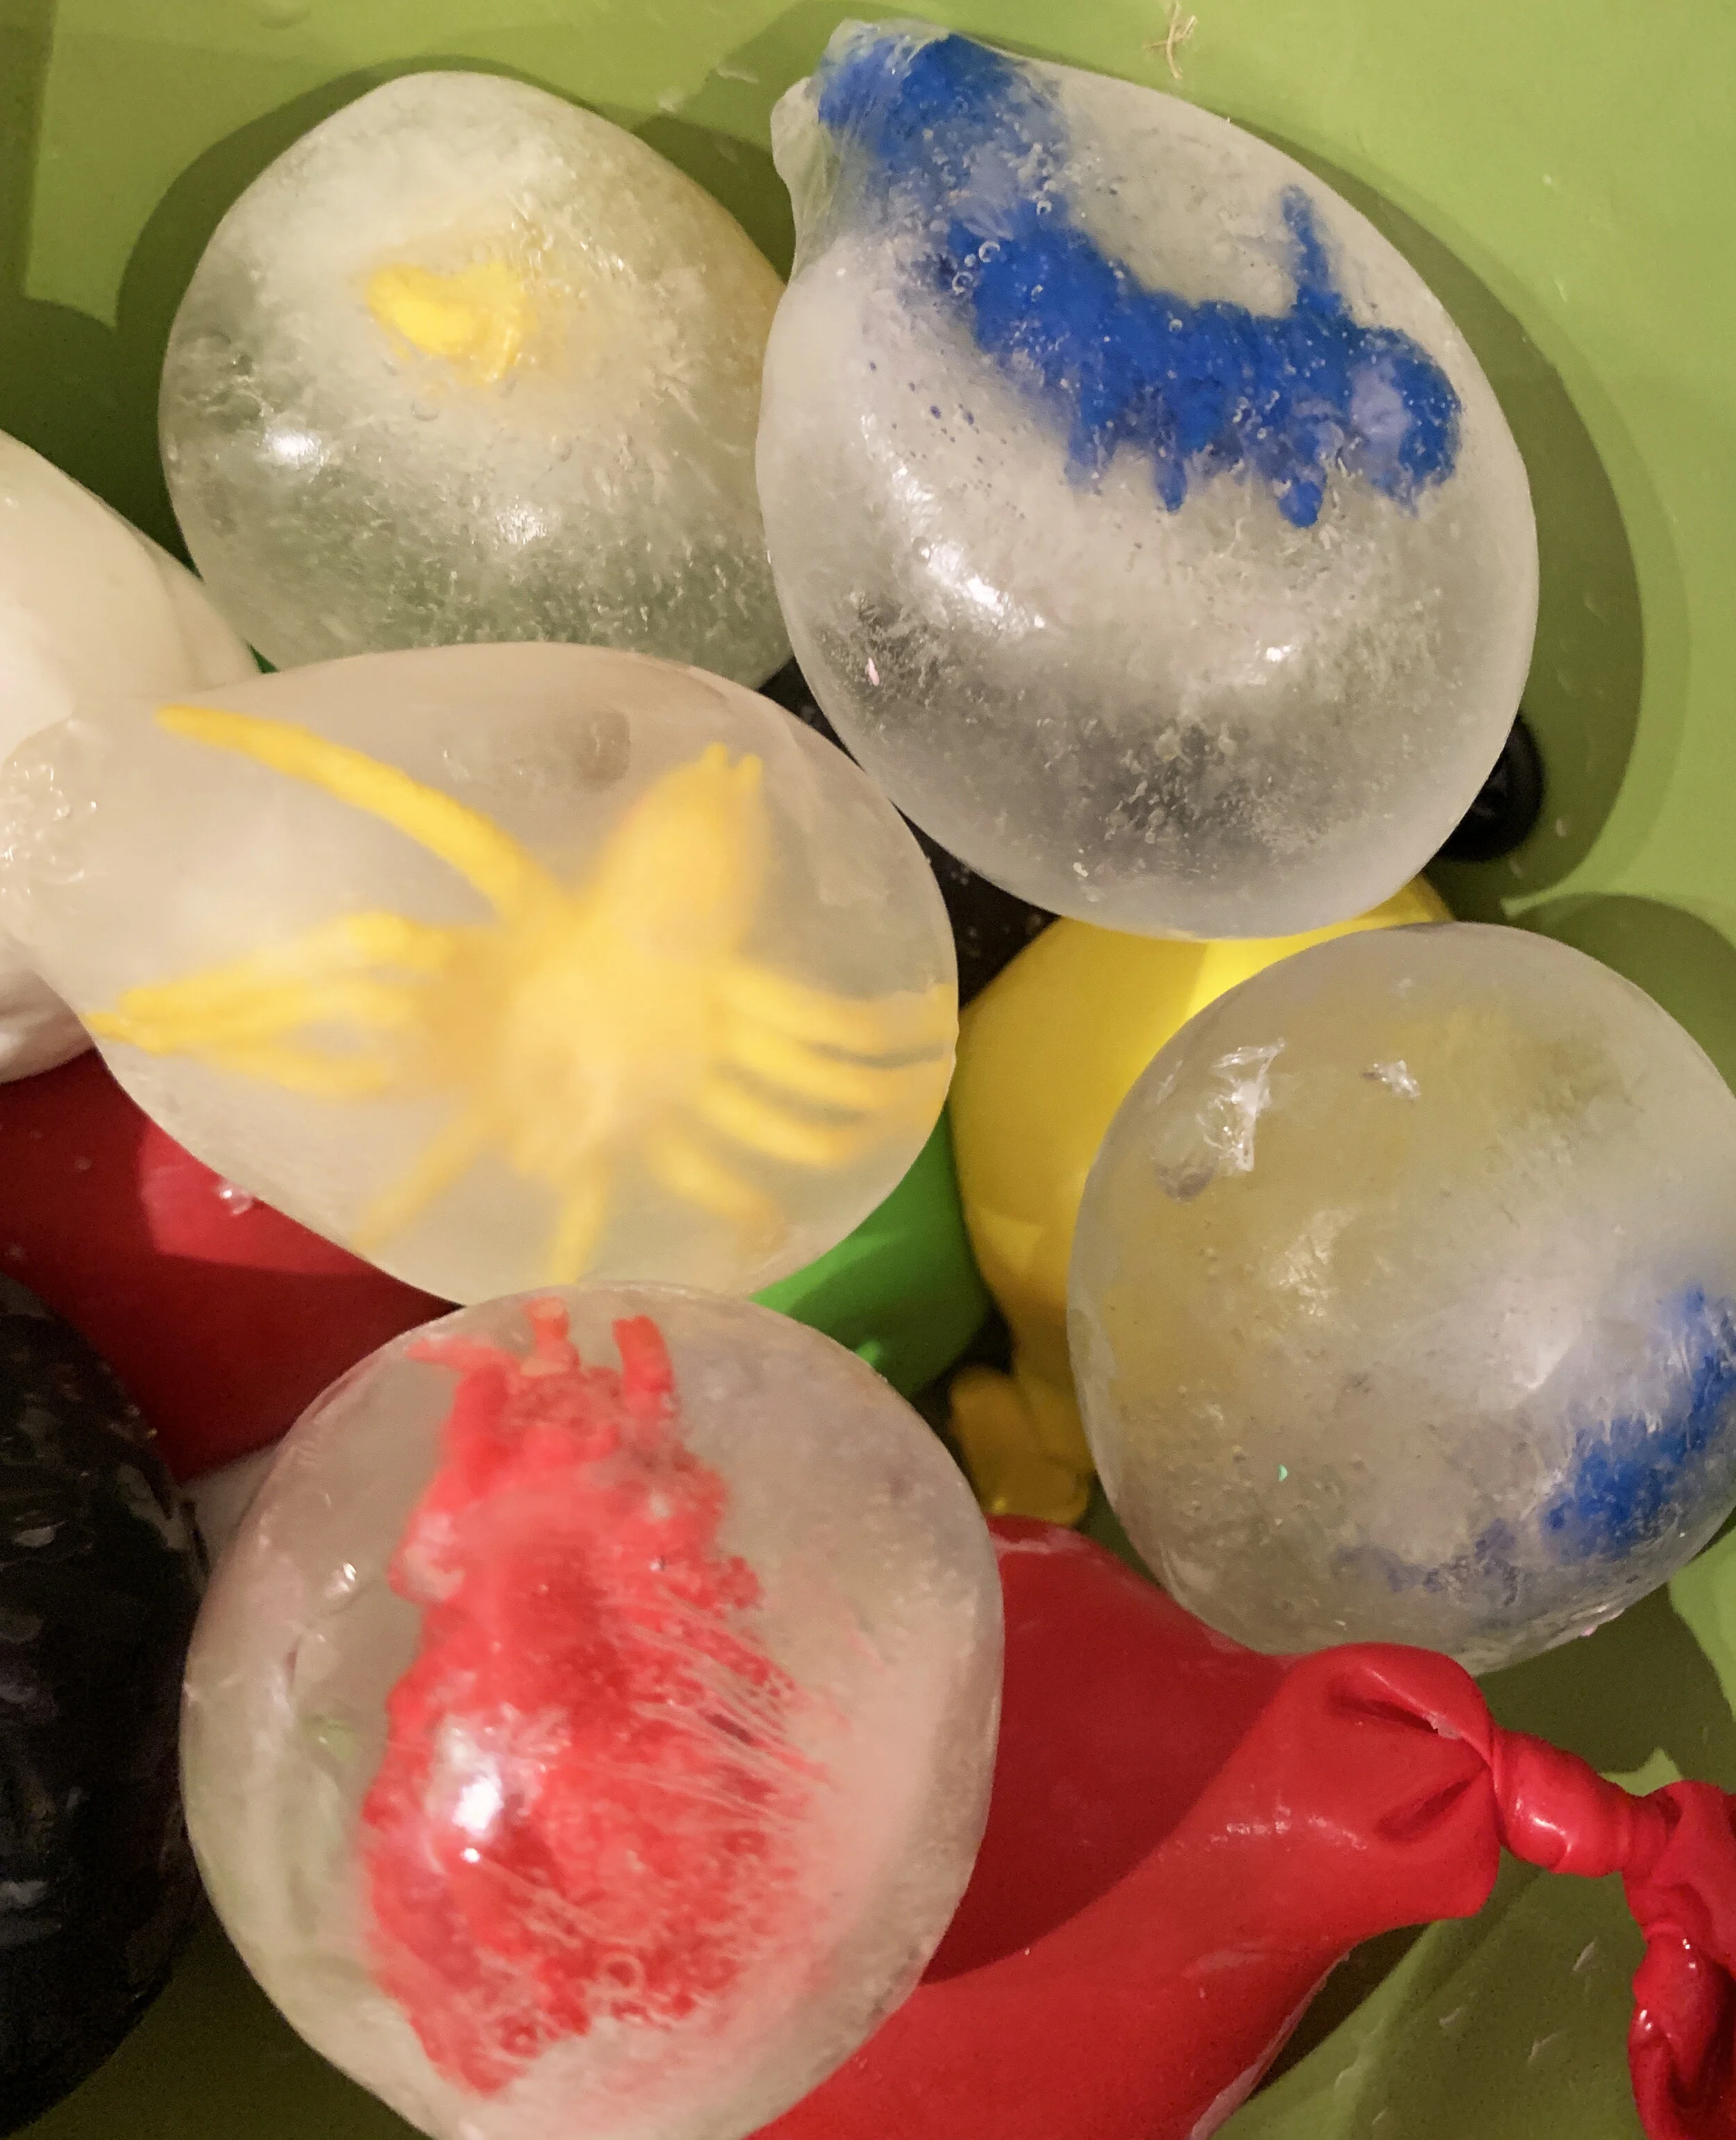
Frozen Spider Eggs
What You’ll Need:
Balloons
Water
Toy plastic spiders & bugs
Optional - squeeze dropper and water
Instructions
Stick a small plastic insect into a un-inflated balloon. Add water until it reaches an egg shape. Tie balloons.
Put balloons in the freezer and allow water time to freeze.
Once the water is frozen, cut off the balloon leaving just the frozen spider “egg” behind.
Put in a bowl and allow kids to hold them, play with them and explore what happens as the ice melts. Play with squirting water on the ice to help it melt faster.

Spider eggs in Oobleck
Water Beads
Water beads are slippery, squishy and tons of fun for kids and adults. Every time we bring these out in our studio, our staff enjoys them as much as the kids.
However, these are a huge choking hazard - especially if ingested before they are soaked in water. So please do not use these if you have a child under 4 in your house or have a child that is prone to putting things in his or her mouth. And they should ALWAYS be used with close adult supervision.
What You’ll Need:
Water beads - these are fun because you can make only specific colors which is great for holidays like Halloween!
Instructions
Choose your container. We like to use water beads while kids are seated at the table (as opposed to doing sensory play on the floor) so don’t choose a container that is too large. Busser tubs work great because they have high sides which helps keep the water beads from spilling everywhere
Mix your water beads. We generally do 1 tablespoon of beads for every 5 cups of water but it doesn’t have to be exact. You can also follow the directions on the package.
After water beads have soaked in water for 6-8 hours or overnight, they are ready to play. Pair with scoopers and tongs for fun and to help build fine motor skills.