Forest Animals Week
Forest Animal Week
The layers of the forests give us such a great opportunity to teach kids about depth. These forest animal art project are a fun way to have kids look at both the foreground and the background.
Check out these forest animal projects:

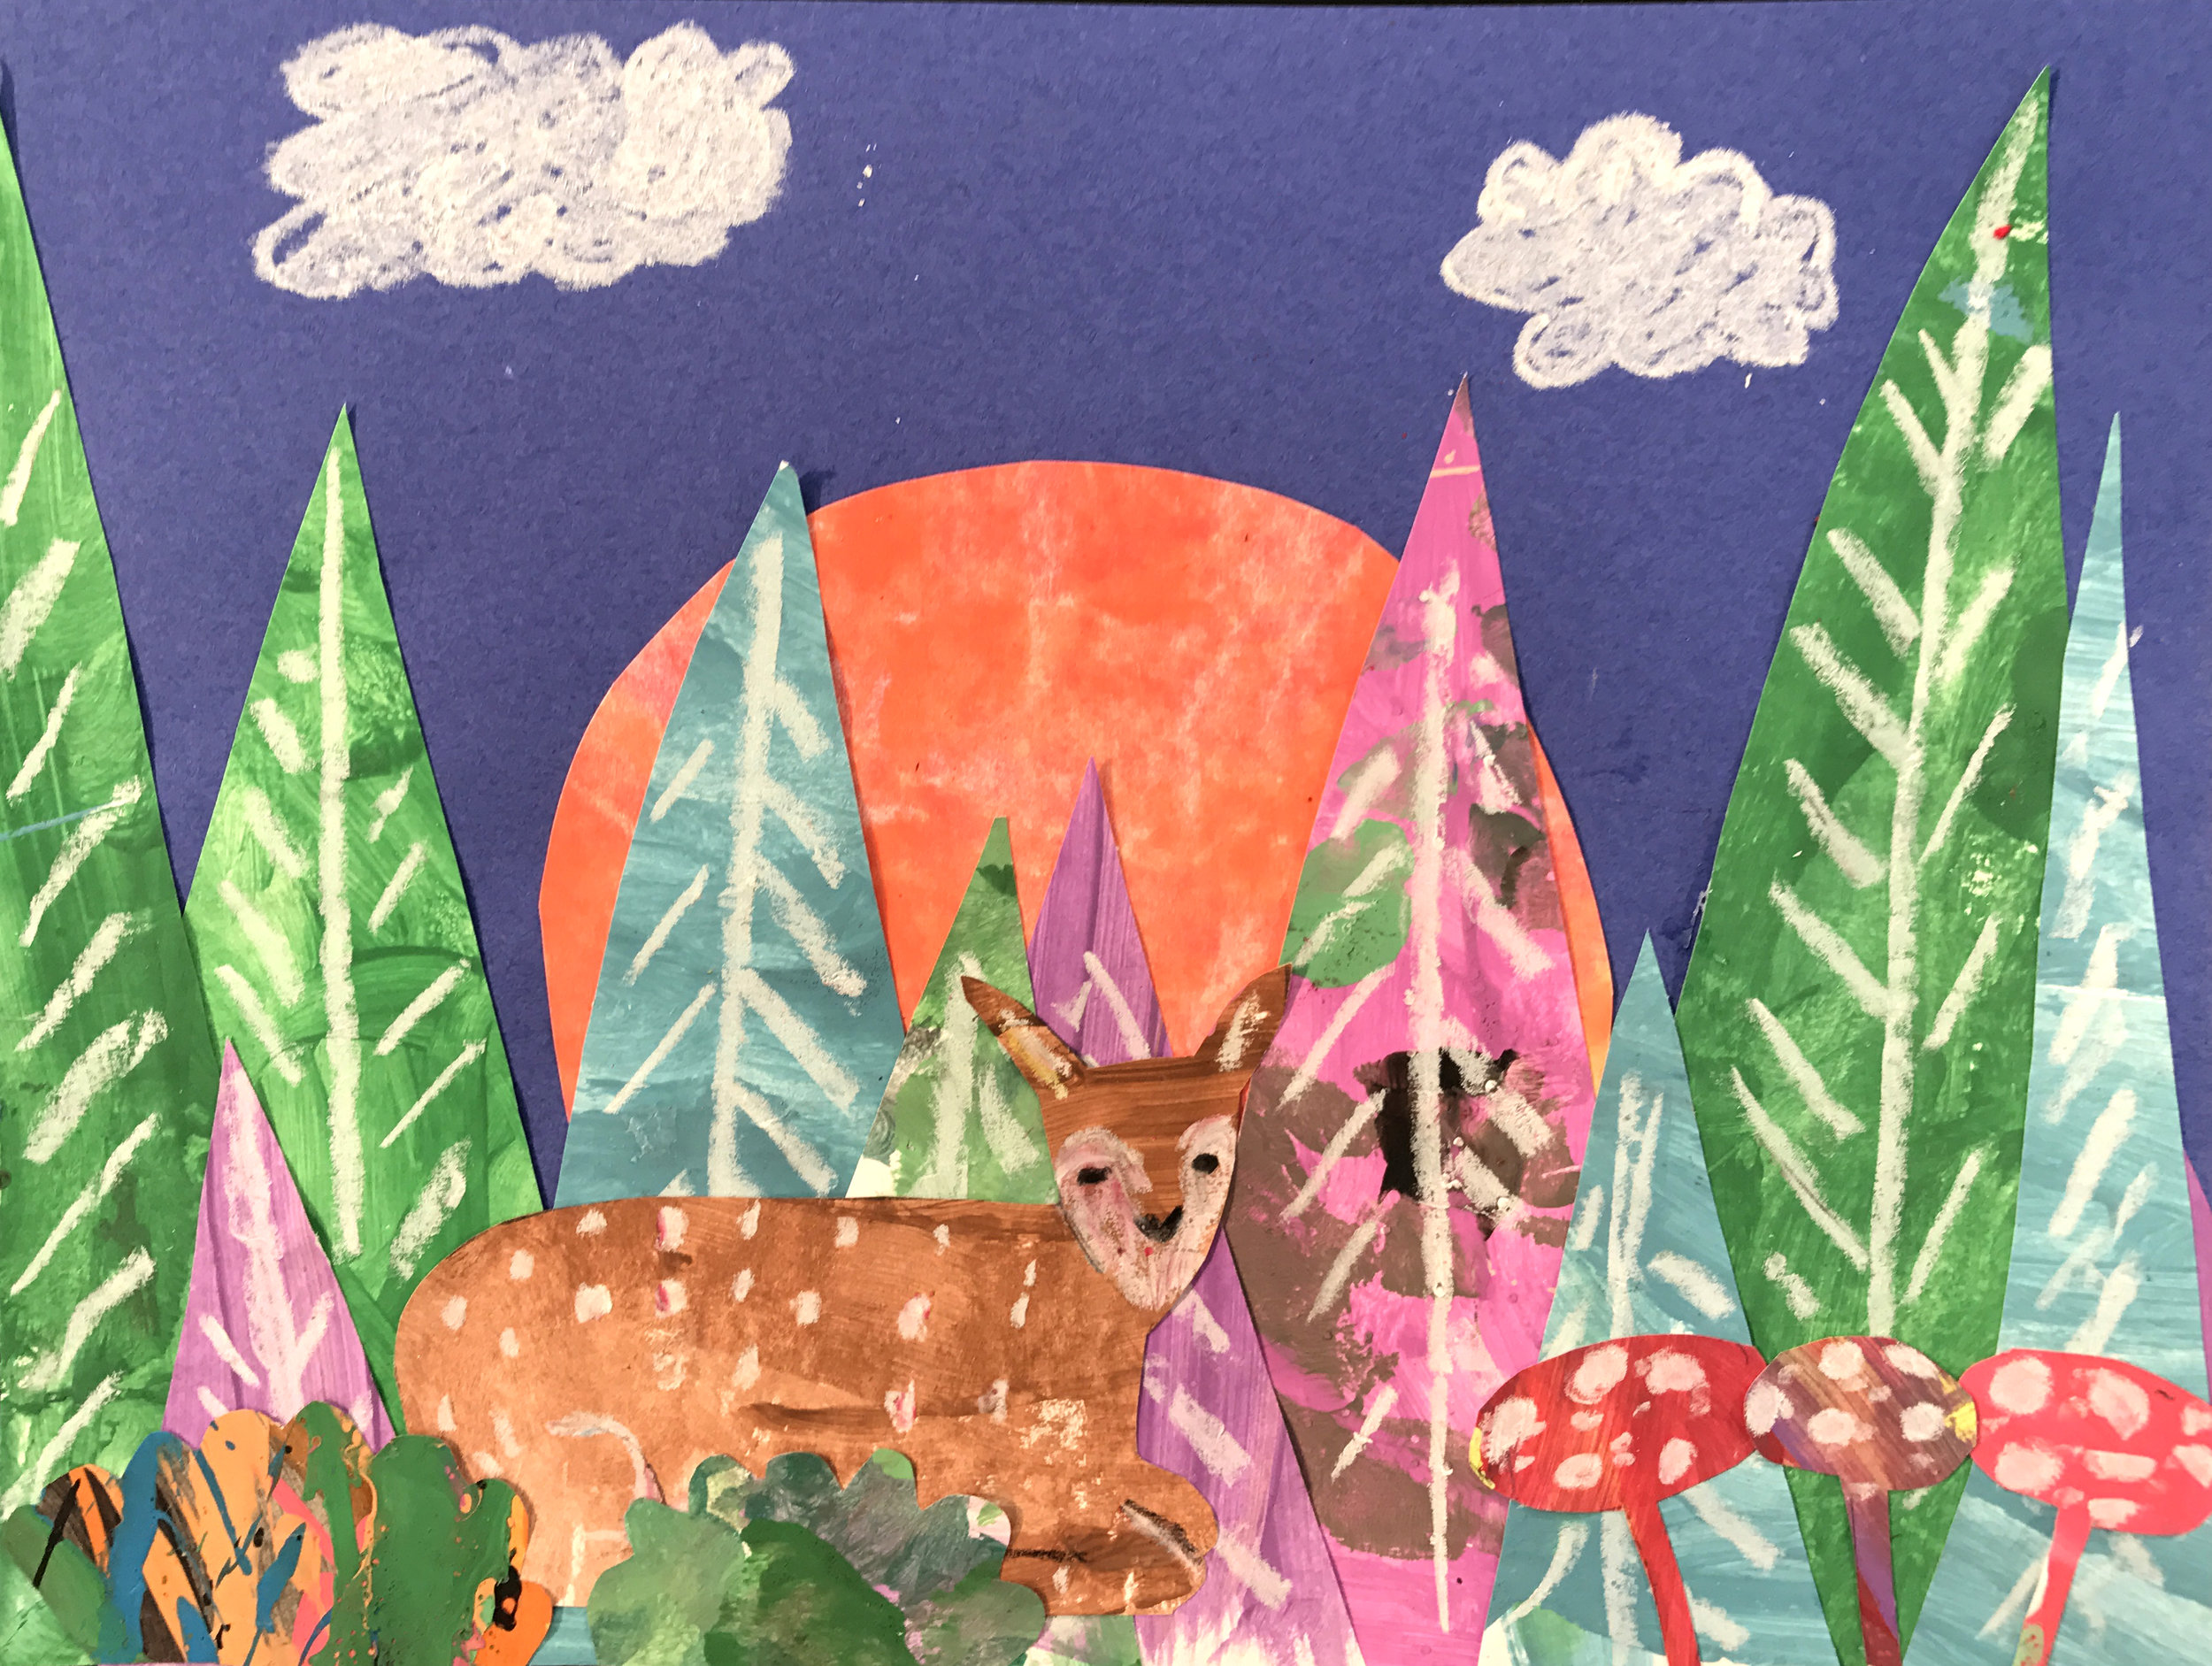
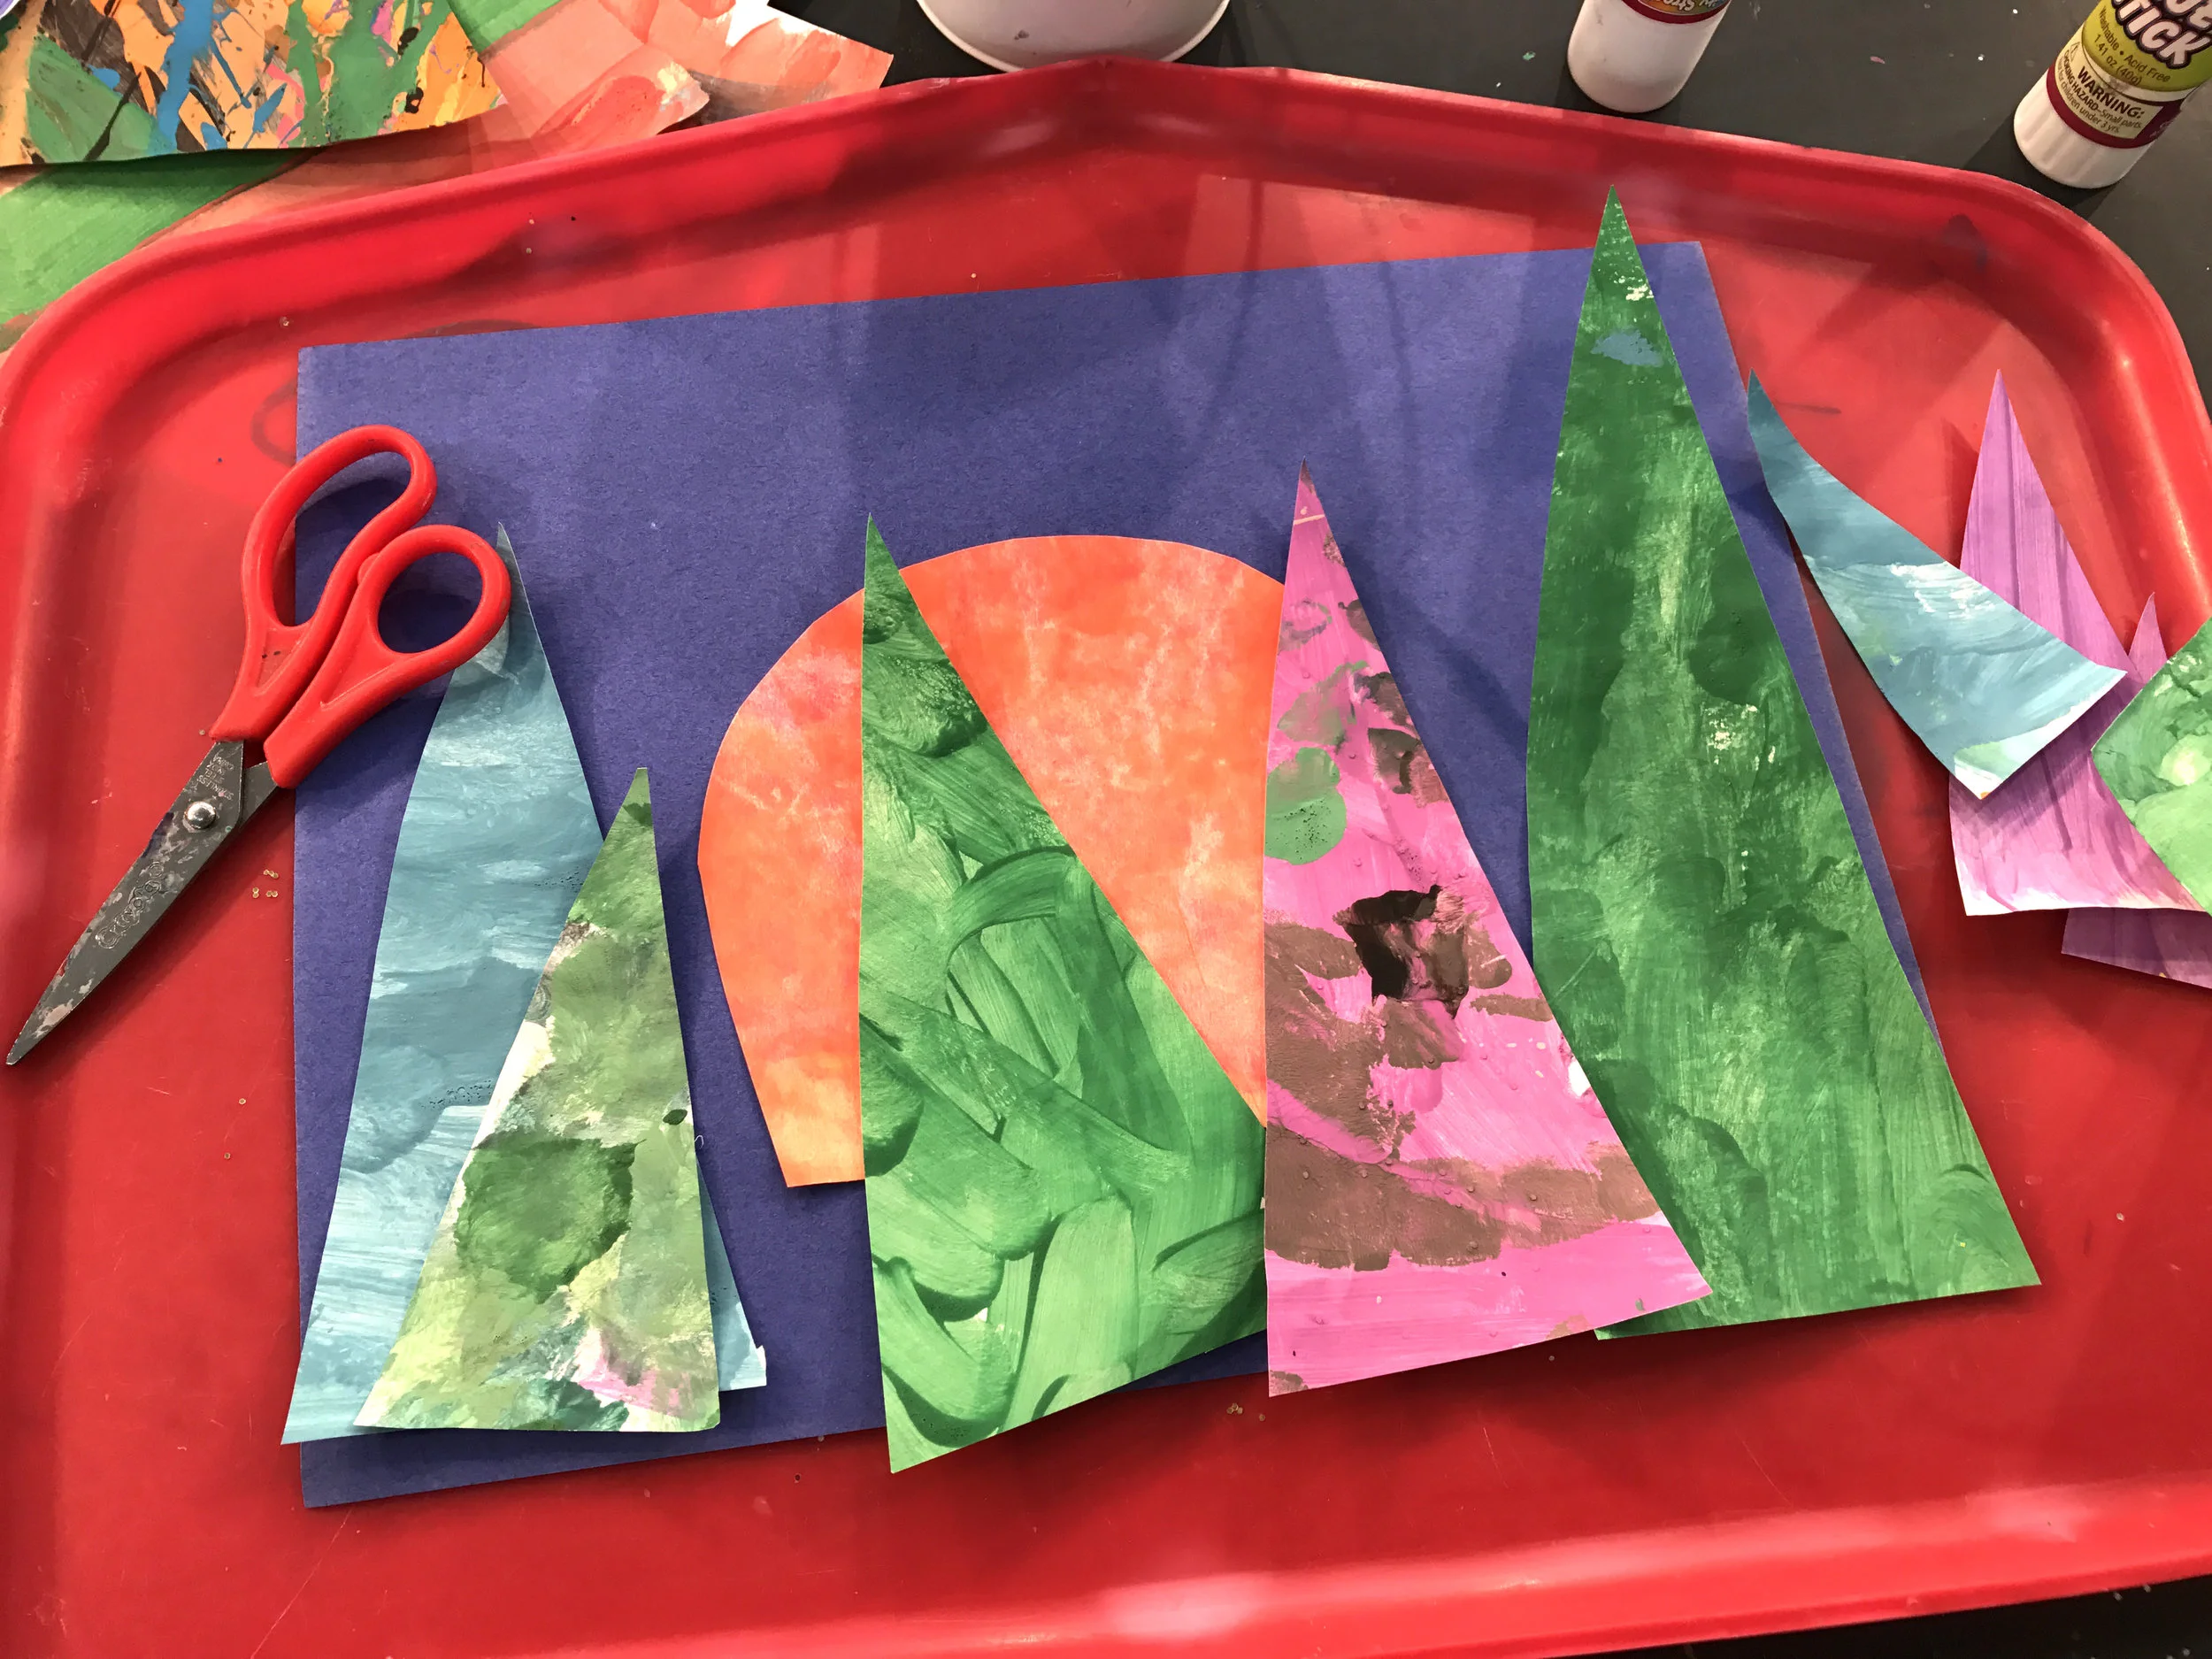
Collage A Forest
What You Will Need:
Collage Paper (we use recycled paintings!)
Scissors
Glue Stick
1. Cut out shapes for the forest. Use triangles for trees and a circle for the sunset. Begin to lay them on a piece of construction paper. Put the sun on first, followed by the largest/tallest trees, and smaller ones in the front to give a sense of dimension. Secure everything with a glue stick. Decorate the trees by adding patterns with oil pastels.
2. Draw your animal on a piece of collage paper. Cut it out and glue it down. Use oil pastels to fill in details.
4. Feel free to add any additional elements in the front such as flowers, shrubs, mushrooms, etc.
Model Magic Clay Hedgehog
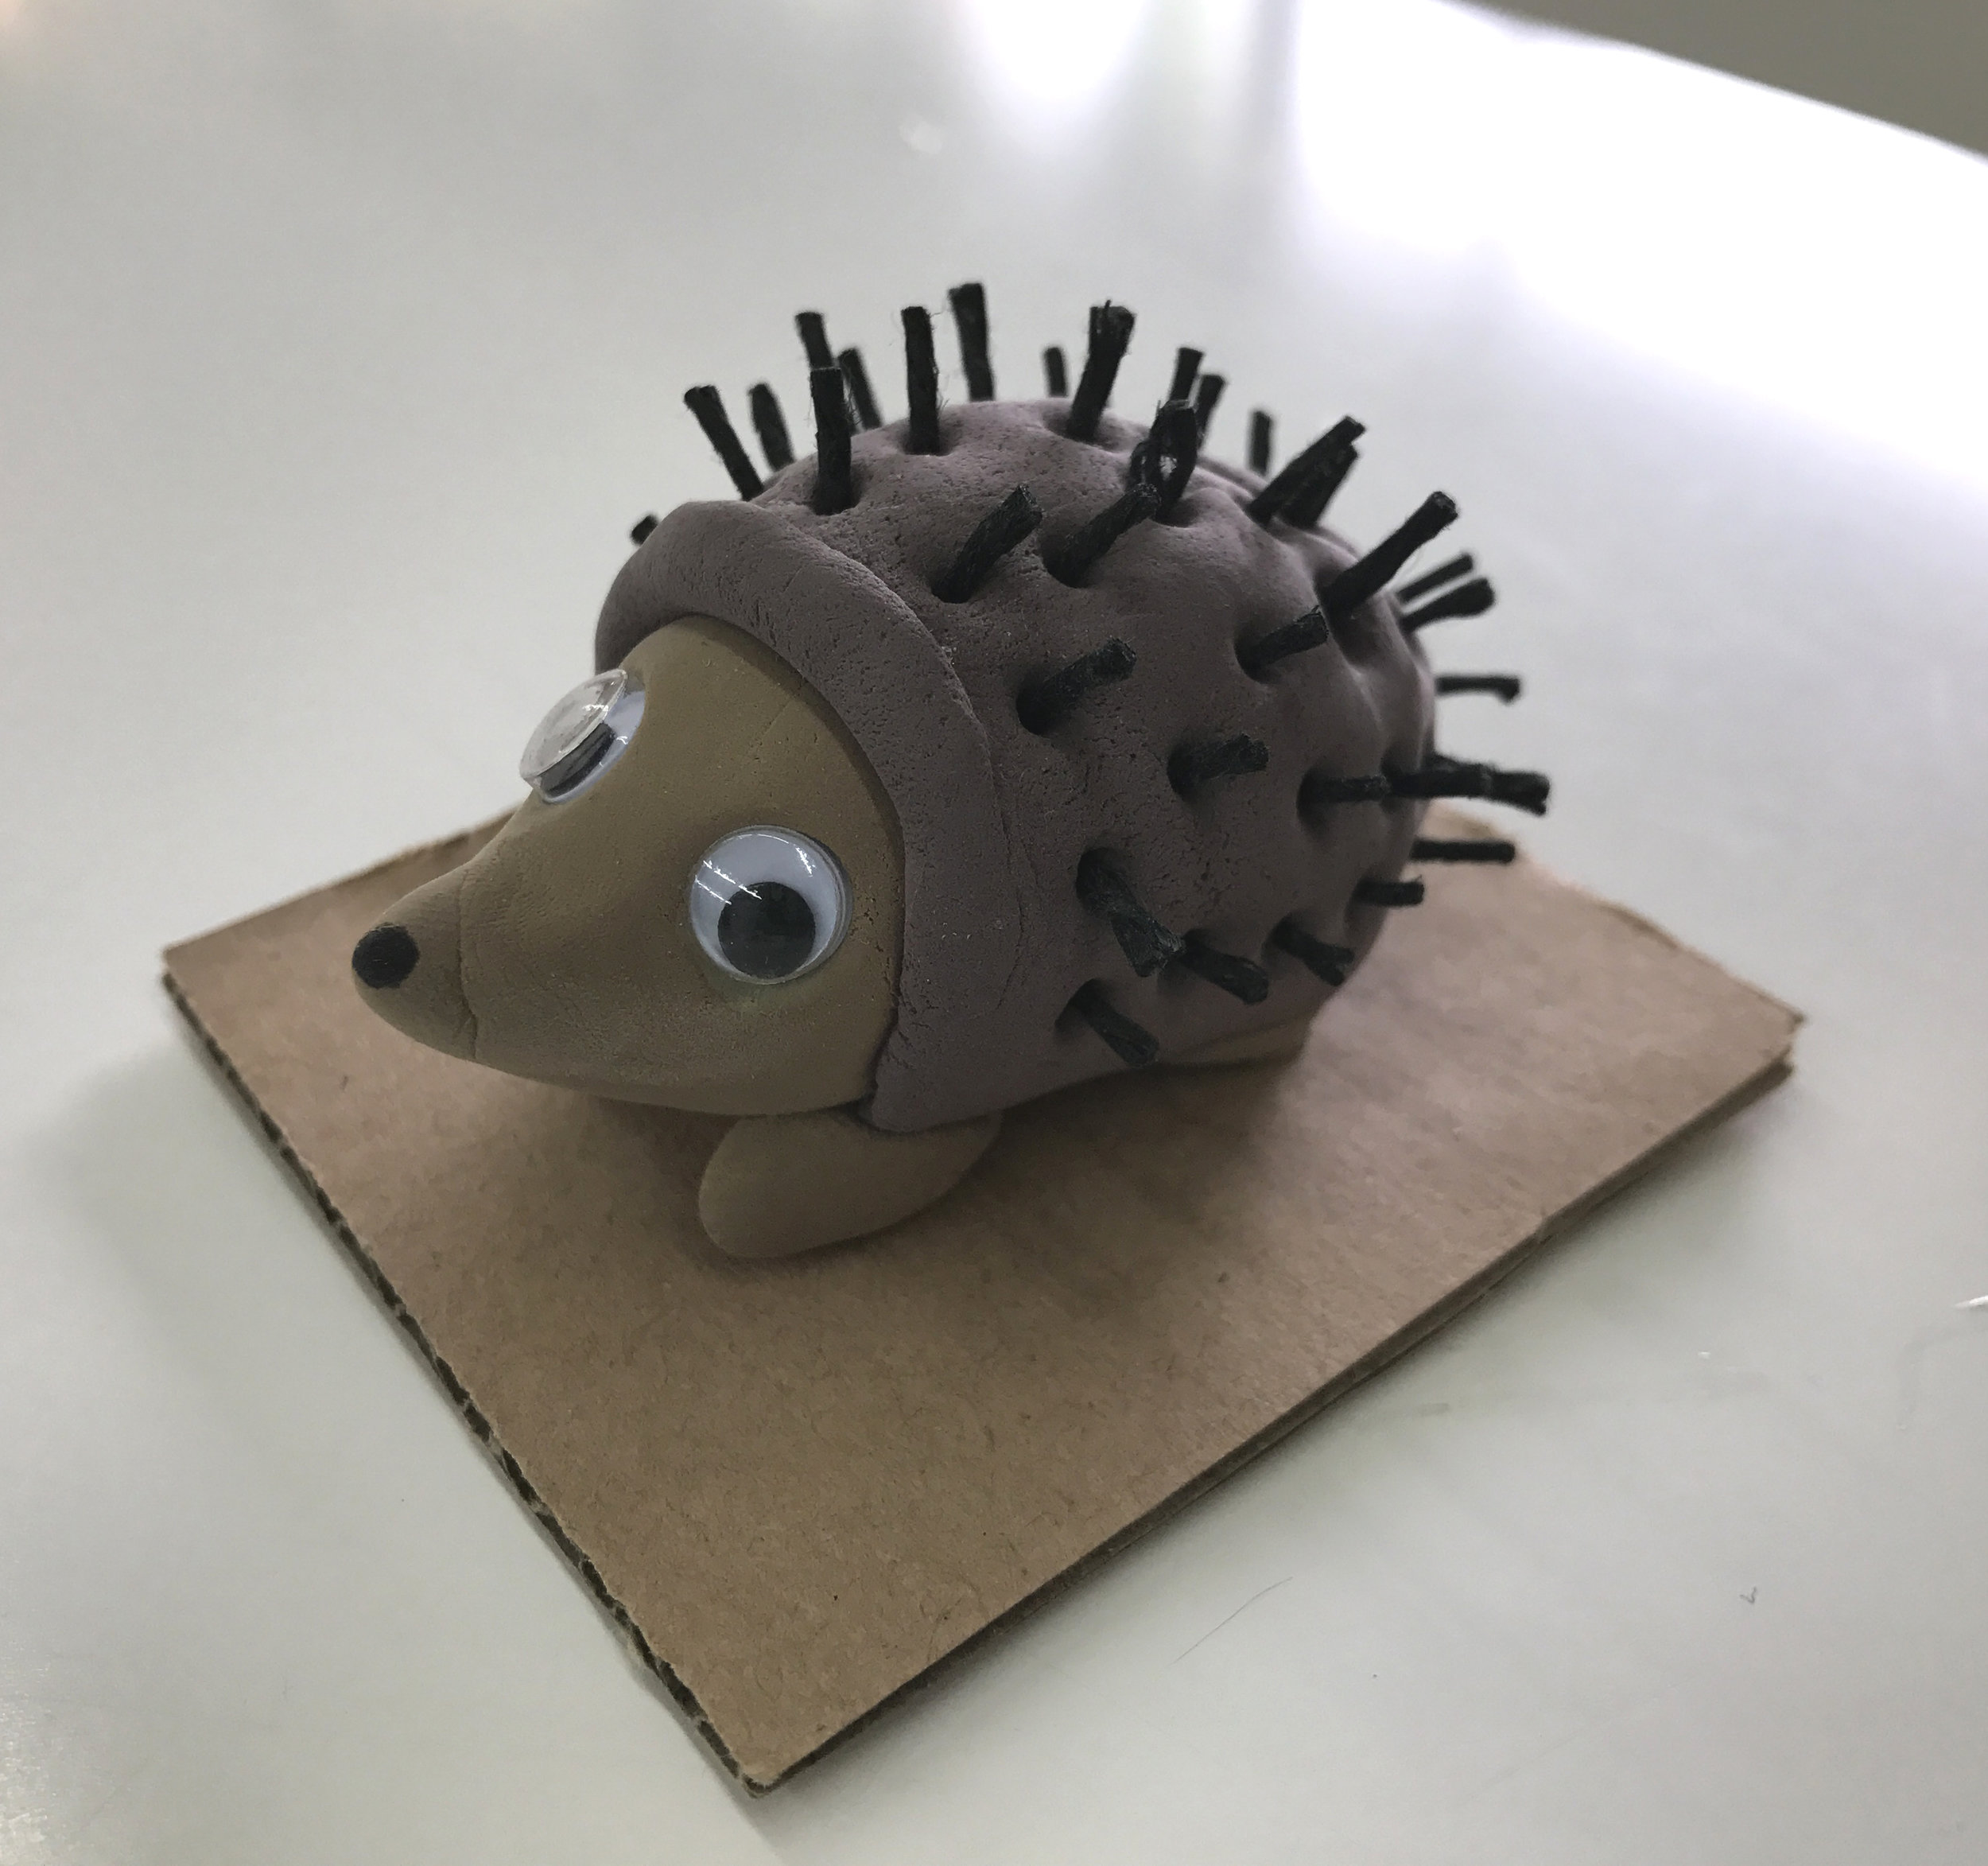
What you will need:
Model Magic Clay - you can either purchase brown color, or for a fun color mixing lesson, get a set of primary colors (red, yellow and blue) and mix them all together to make your own brown. Model Magic will air dry in 24-48 hours.
Wiggle Eyes
Glue
String for the quills. We used a waxy string
Permanent markers
Optional: hot glue & cardboard
1. Roll your clay into a ball. Pinch off 4 equal and tiny pieces for the legs. Form an egg shape using the larger piece. Using your fingers, pinch out the pointy nose.
2. To form the legs, roll the 4 pieces into tiny balls & pinch to make the leg shape. Attach them to the body.
3. Add details. Use glue to attach the wiggle eyes (this sticks better than just sticking them into the clay). Cut tiny pieces of string and stick them in the hedgehog to form the quills. Add any remaining details using a Sharpie or permanent marker.
OPTIONAL: Attach your figure to a piece of cardboard using hot glue. This will help it stand up better as it air dries. You can also decorate the cardboard to form the hedgehog's habitat.
Fox Printmaking
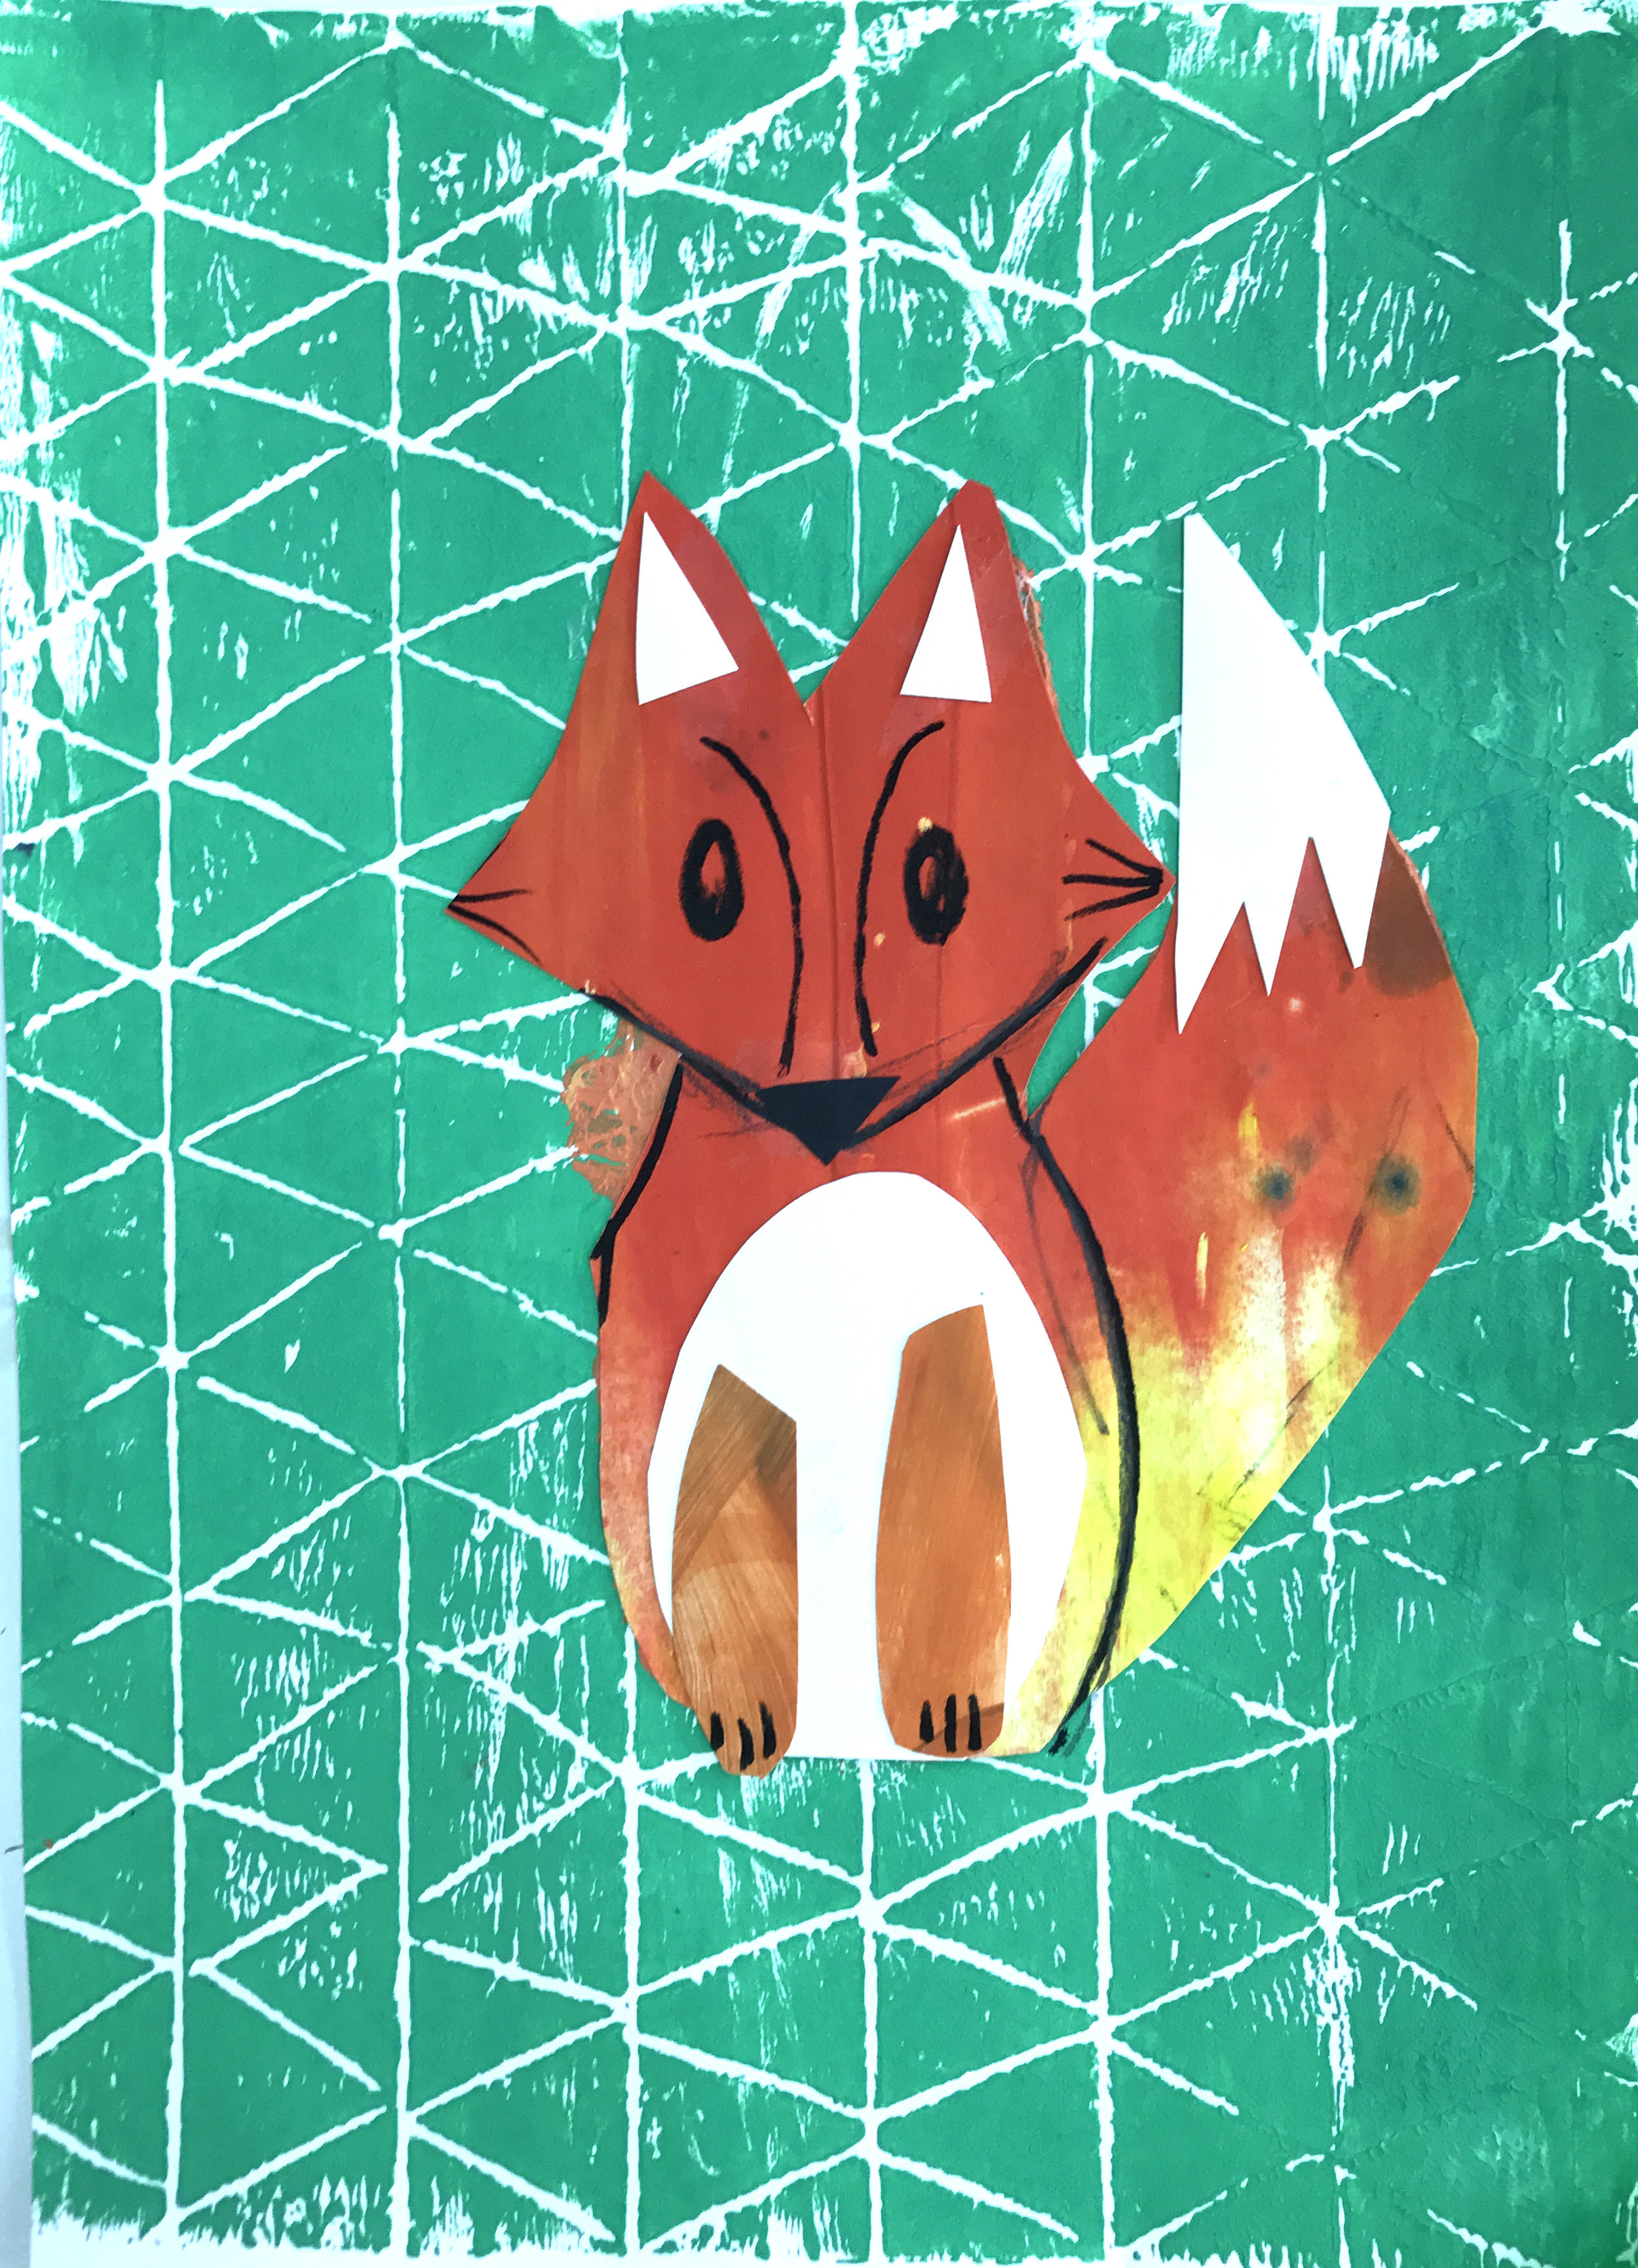
What you will need:
Foam plate. You can use styrofoam or we like Melissa & Doug's scratch-art foam boards. This is a great material for teaching kids the basics of printmaking without the need for sharp objects or expensive materials.
Paint - we used acrylic because it dries fast and is bright. However, if working with kids under the age of 5, we'd recommend Washable paint! We love Crayola brand.
Rubber brayer or a foam brush (you can get these really cheap from the hardware store)
Collage paper - recycled paintings or construction paper works.
Glue stick
Scissors
Sharpie or other black marker
Tray
1. Etch into your foam paper using a wooden stylus. Fill the whole plate with pattern.
2. Pour a little bit of paint on a tray. Apply the paint to the foam board using either a rubber brayer or a foam brush. Make sure paint has coated the paper evenly.
3. Stamp it on your paper. Experiment making multiple prints or "ghost" prints. A "ghost" print is made by making a 2nd print without re-applying any additional paint.
4. Draw your animal out on a piece of collage paper. Cut it out. Next, layer in any details by cutting additional collage paper and/or using a black marker.
Watercolor Forest Animals
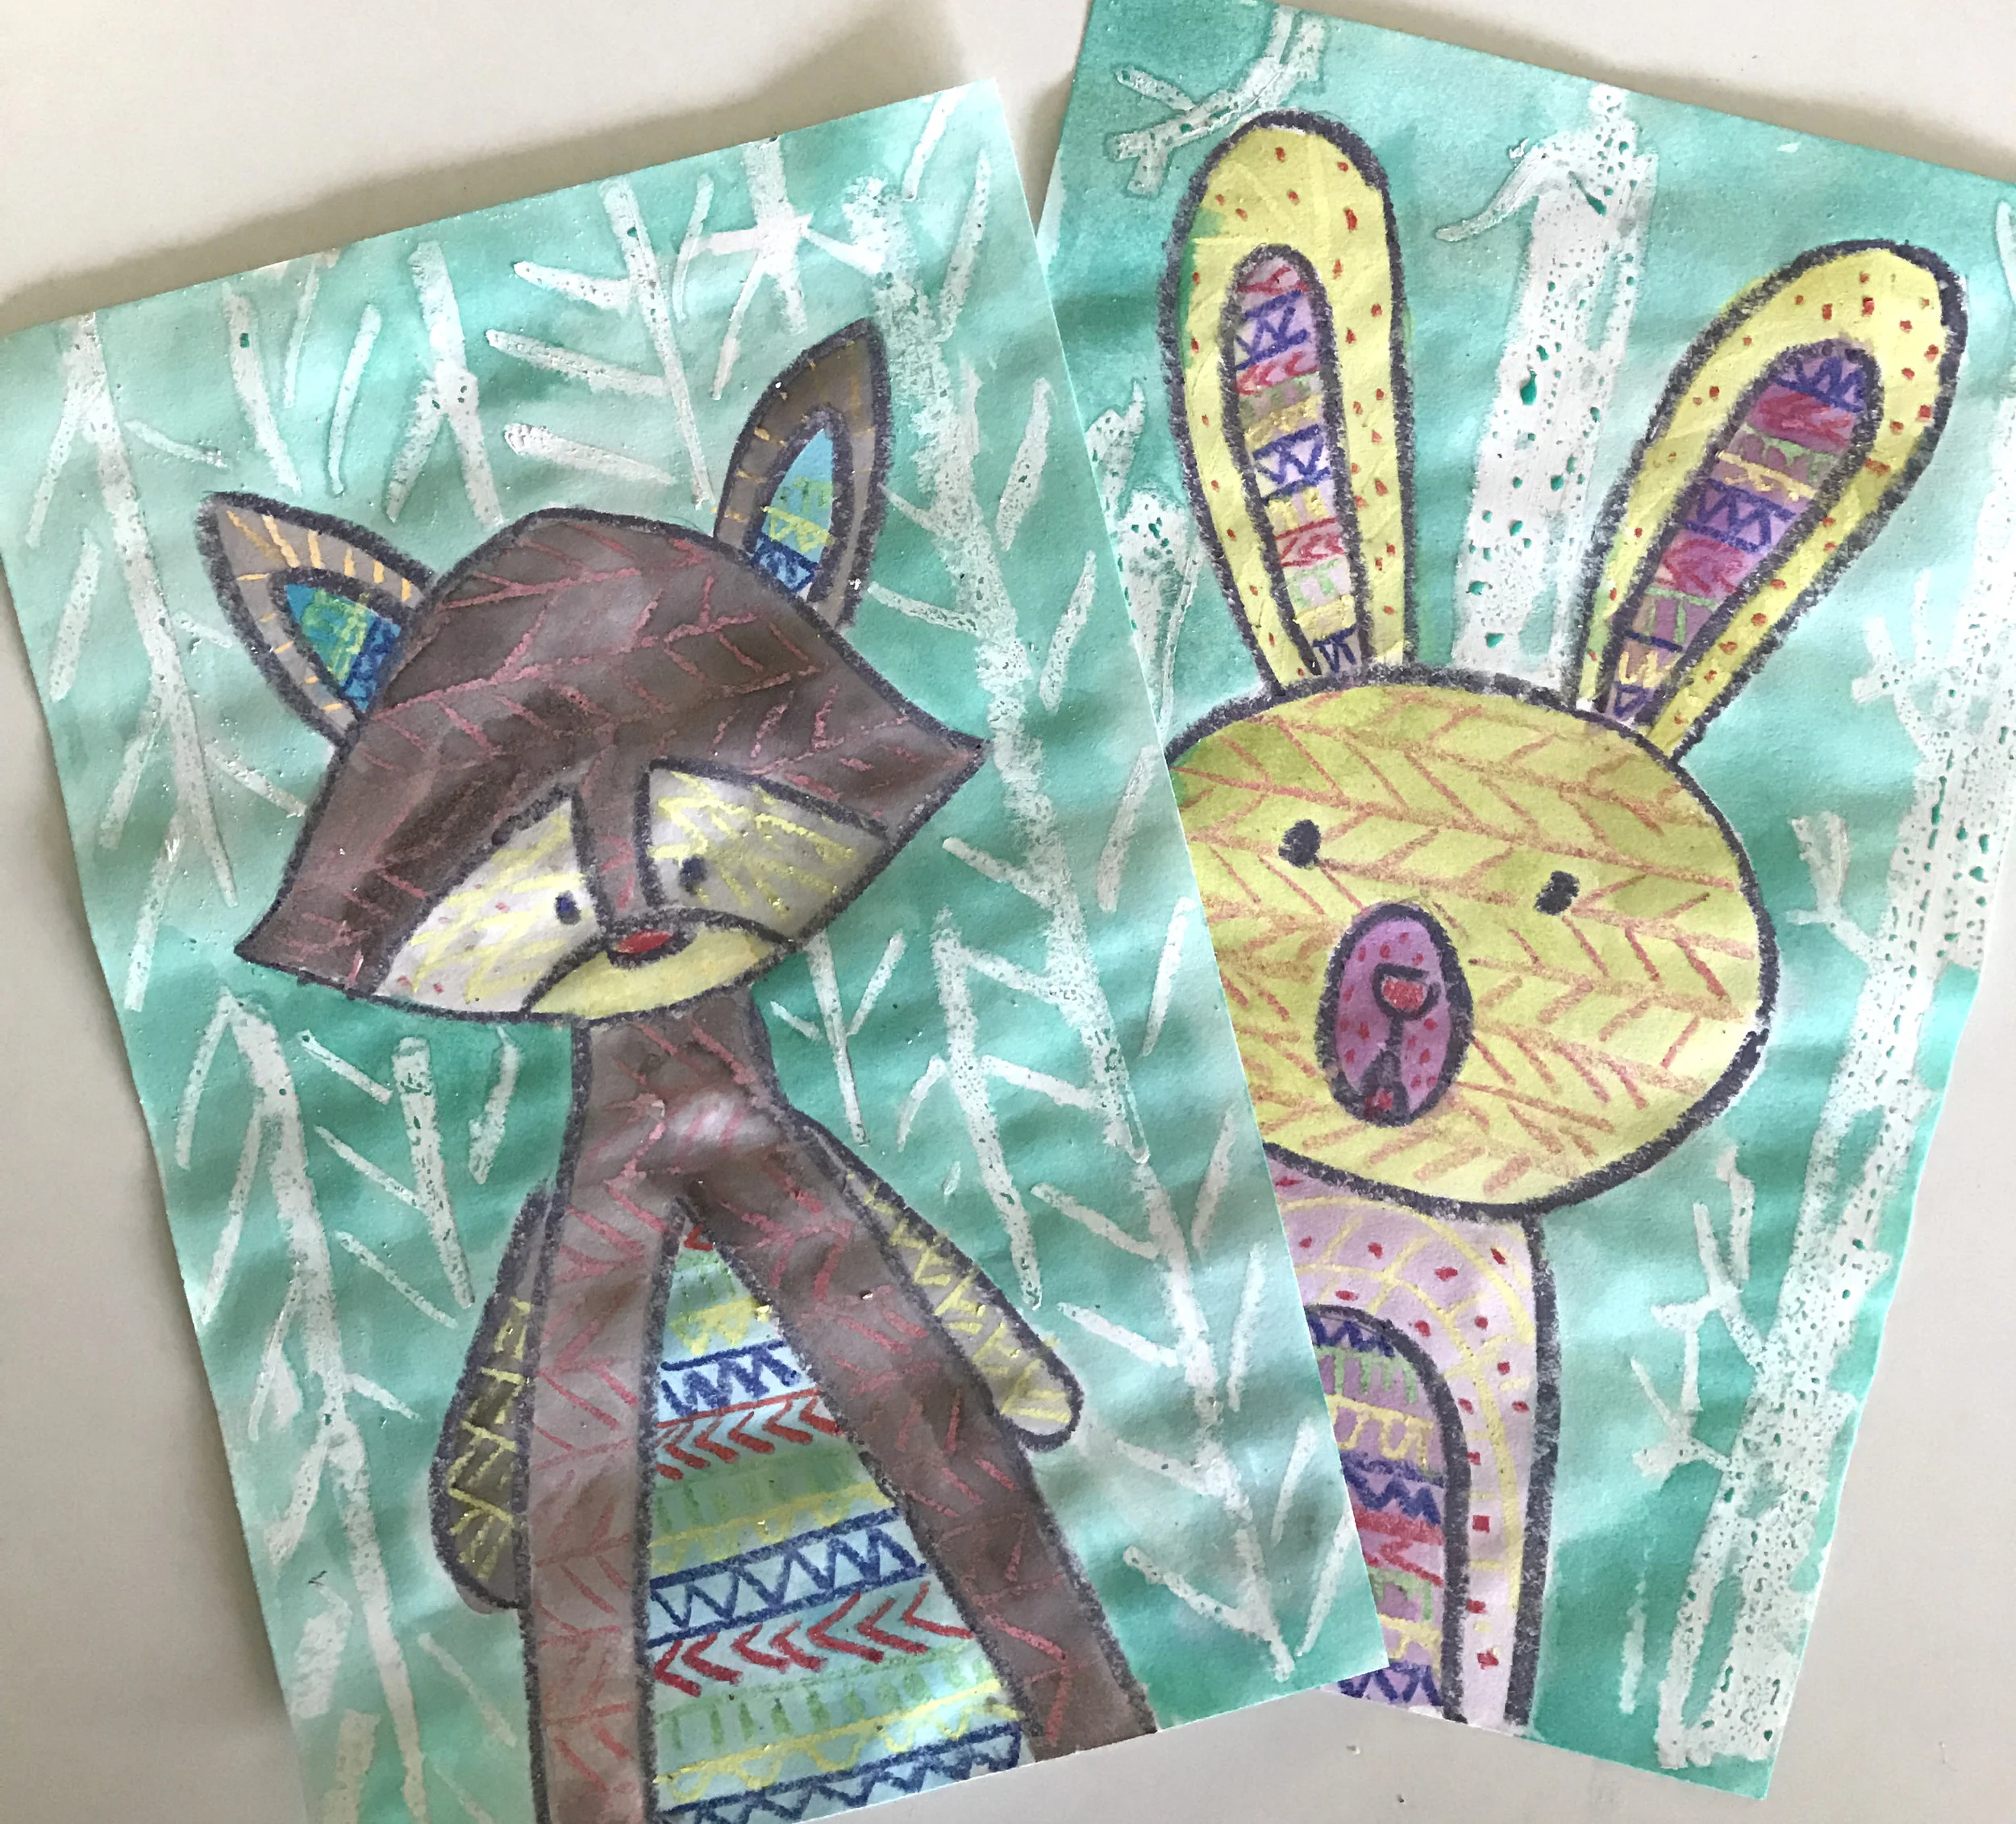
What you will need:
Oil pastels & crayons - we love Crayola's Construction Paper Crayons because they are bright and come in fun colors. They are also great to use when doing watercolor resist because they don't flake off.
Watercolors/brushes
Pencil/eraser
1. Sketch our your animal using a pencil/eraser. Outline your pencil marks with a crayon.
2. Fill in your animals with lots of different patterns. Use a white crayon to draw trees and foliage in the background.
3. Fill in color using watercolor paints. Paint right over the crayon lines, as the watercolor will resist them.
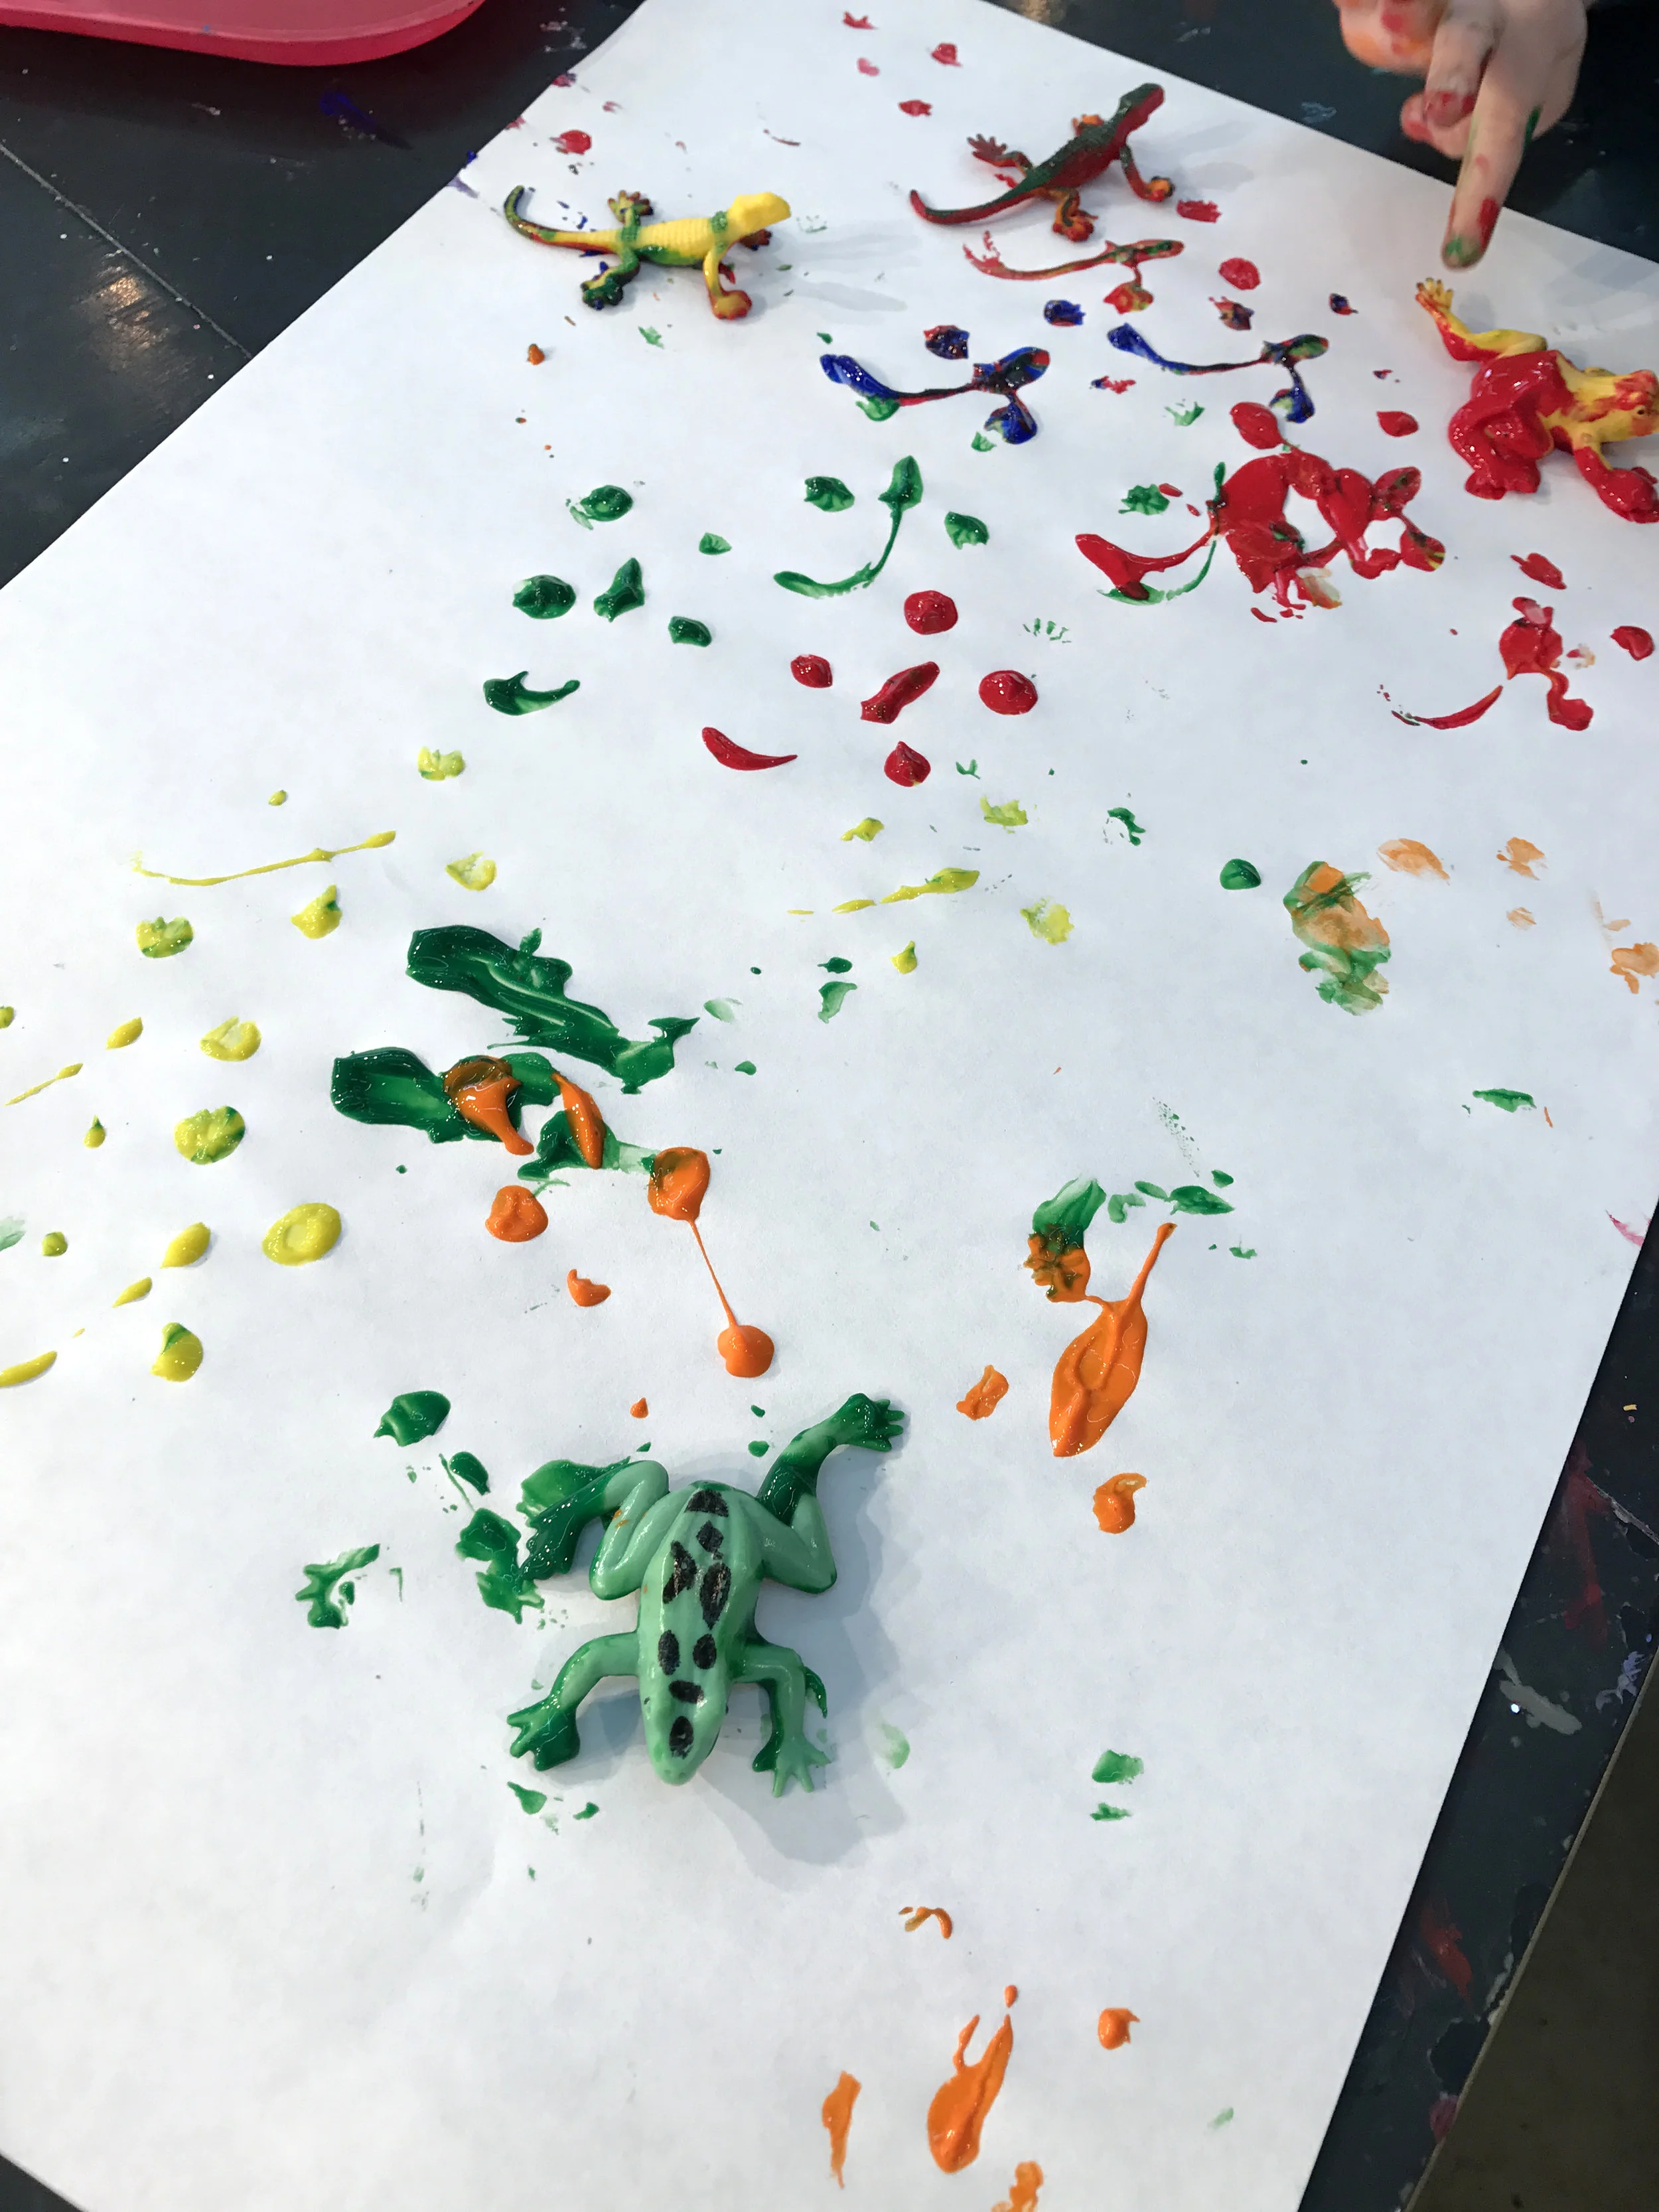
Storytime & Craft
Each week, we do a Storytime & Craft on Tuesdays and Fridays. This week, we read one of our kids' favorite books - I Want My Hat Back by Jon Klassen. The main character in the book encounters beautifully illustrated Forest creatures. For our project, we let kids paint with rubber frogs. It is always fun to see the excitement on kids' faces when they get to paint with something other than a paintbrush!